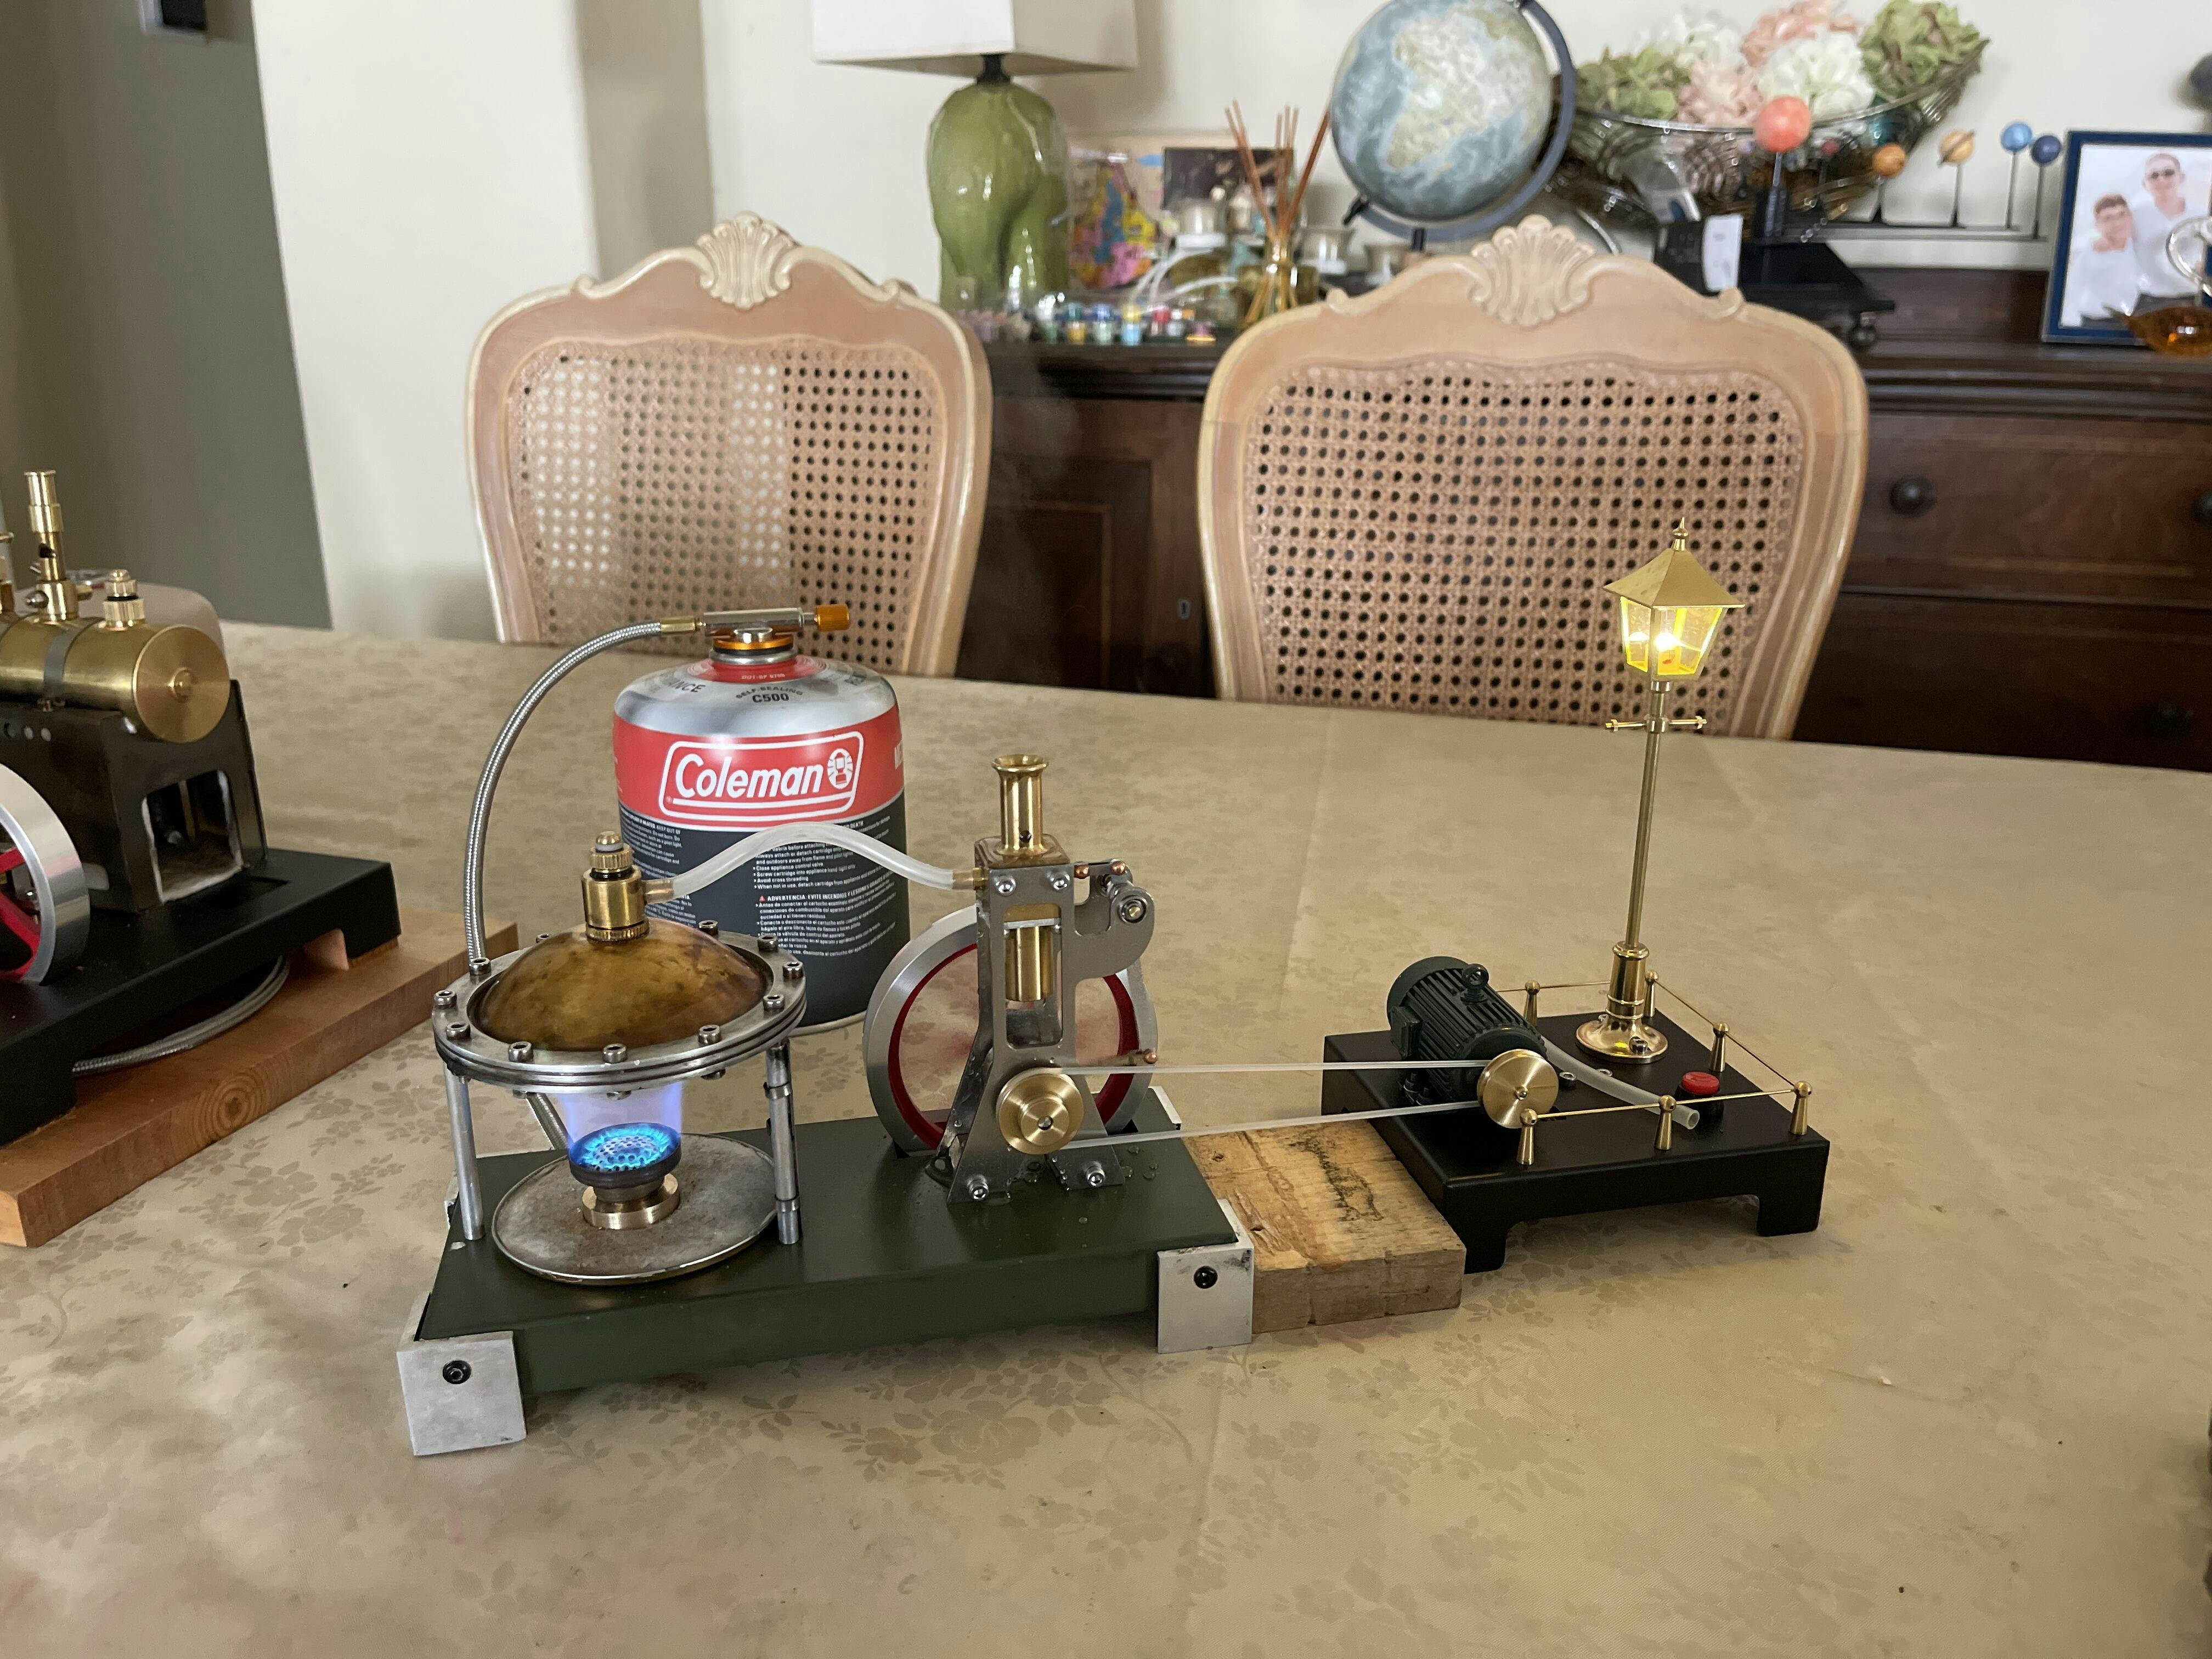
I love most everything about this engine.
Simplicity and elegance. The sound and the steam puffing out of the chimney. I added a backpacking burner to replace the alcohol burner giving much more control over the flame. Now it is near perfect.
Thanks for a great engine.

Please check out my review on Model Ship World
https://modelshipworld.com/topic/38253-118-ws-15-turbofan-engine-skymech-via-enginediy-build-review/


I am pleased to see that you have taken the time to look for customer imput. I am taking my time to complete the engine and have enjoyed the experience, so far. My biggest negative, and I know that you have heard this before, are the instructions. I think a lot of people would attempt building the engine with better information available. I know with my engineering experience I will overcome any issues that may arise. My only other negative is a missing threaded rod for the oil filter. The rating I would give it is a 4 1/2 but it was not available.

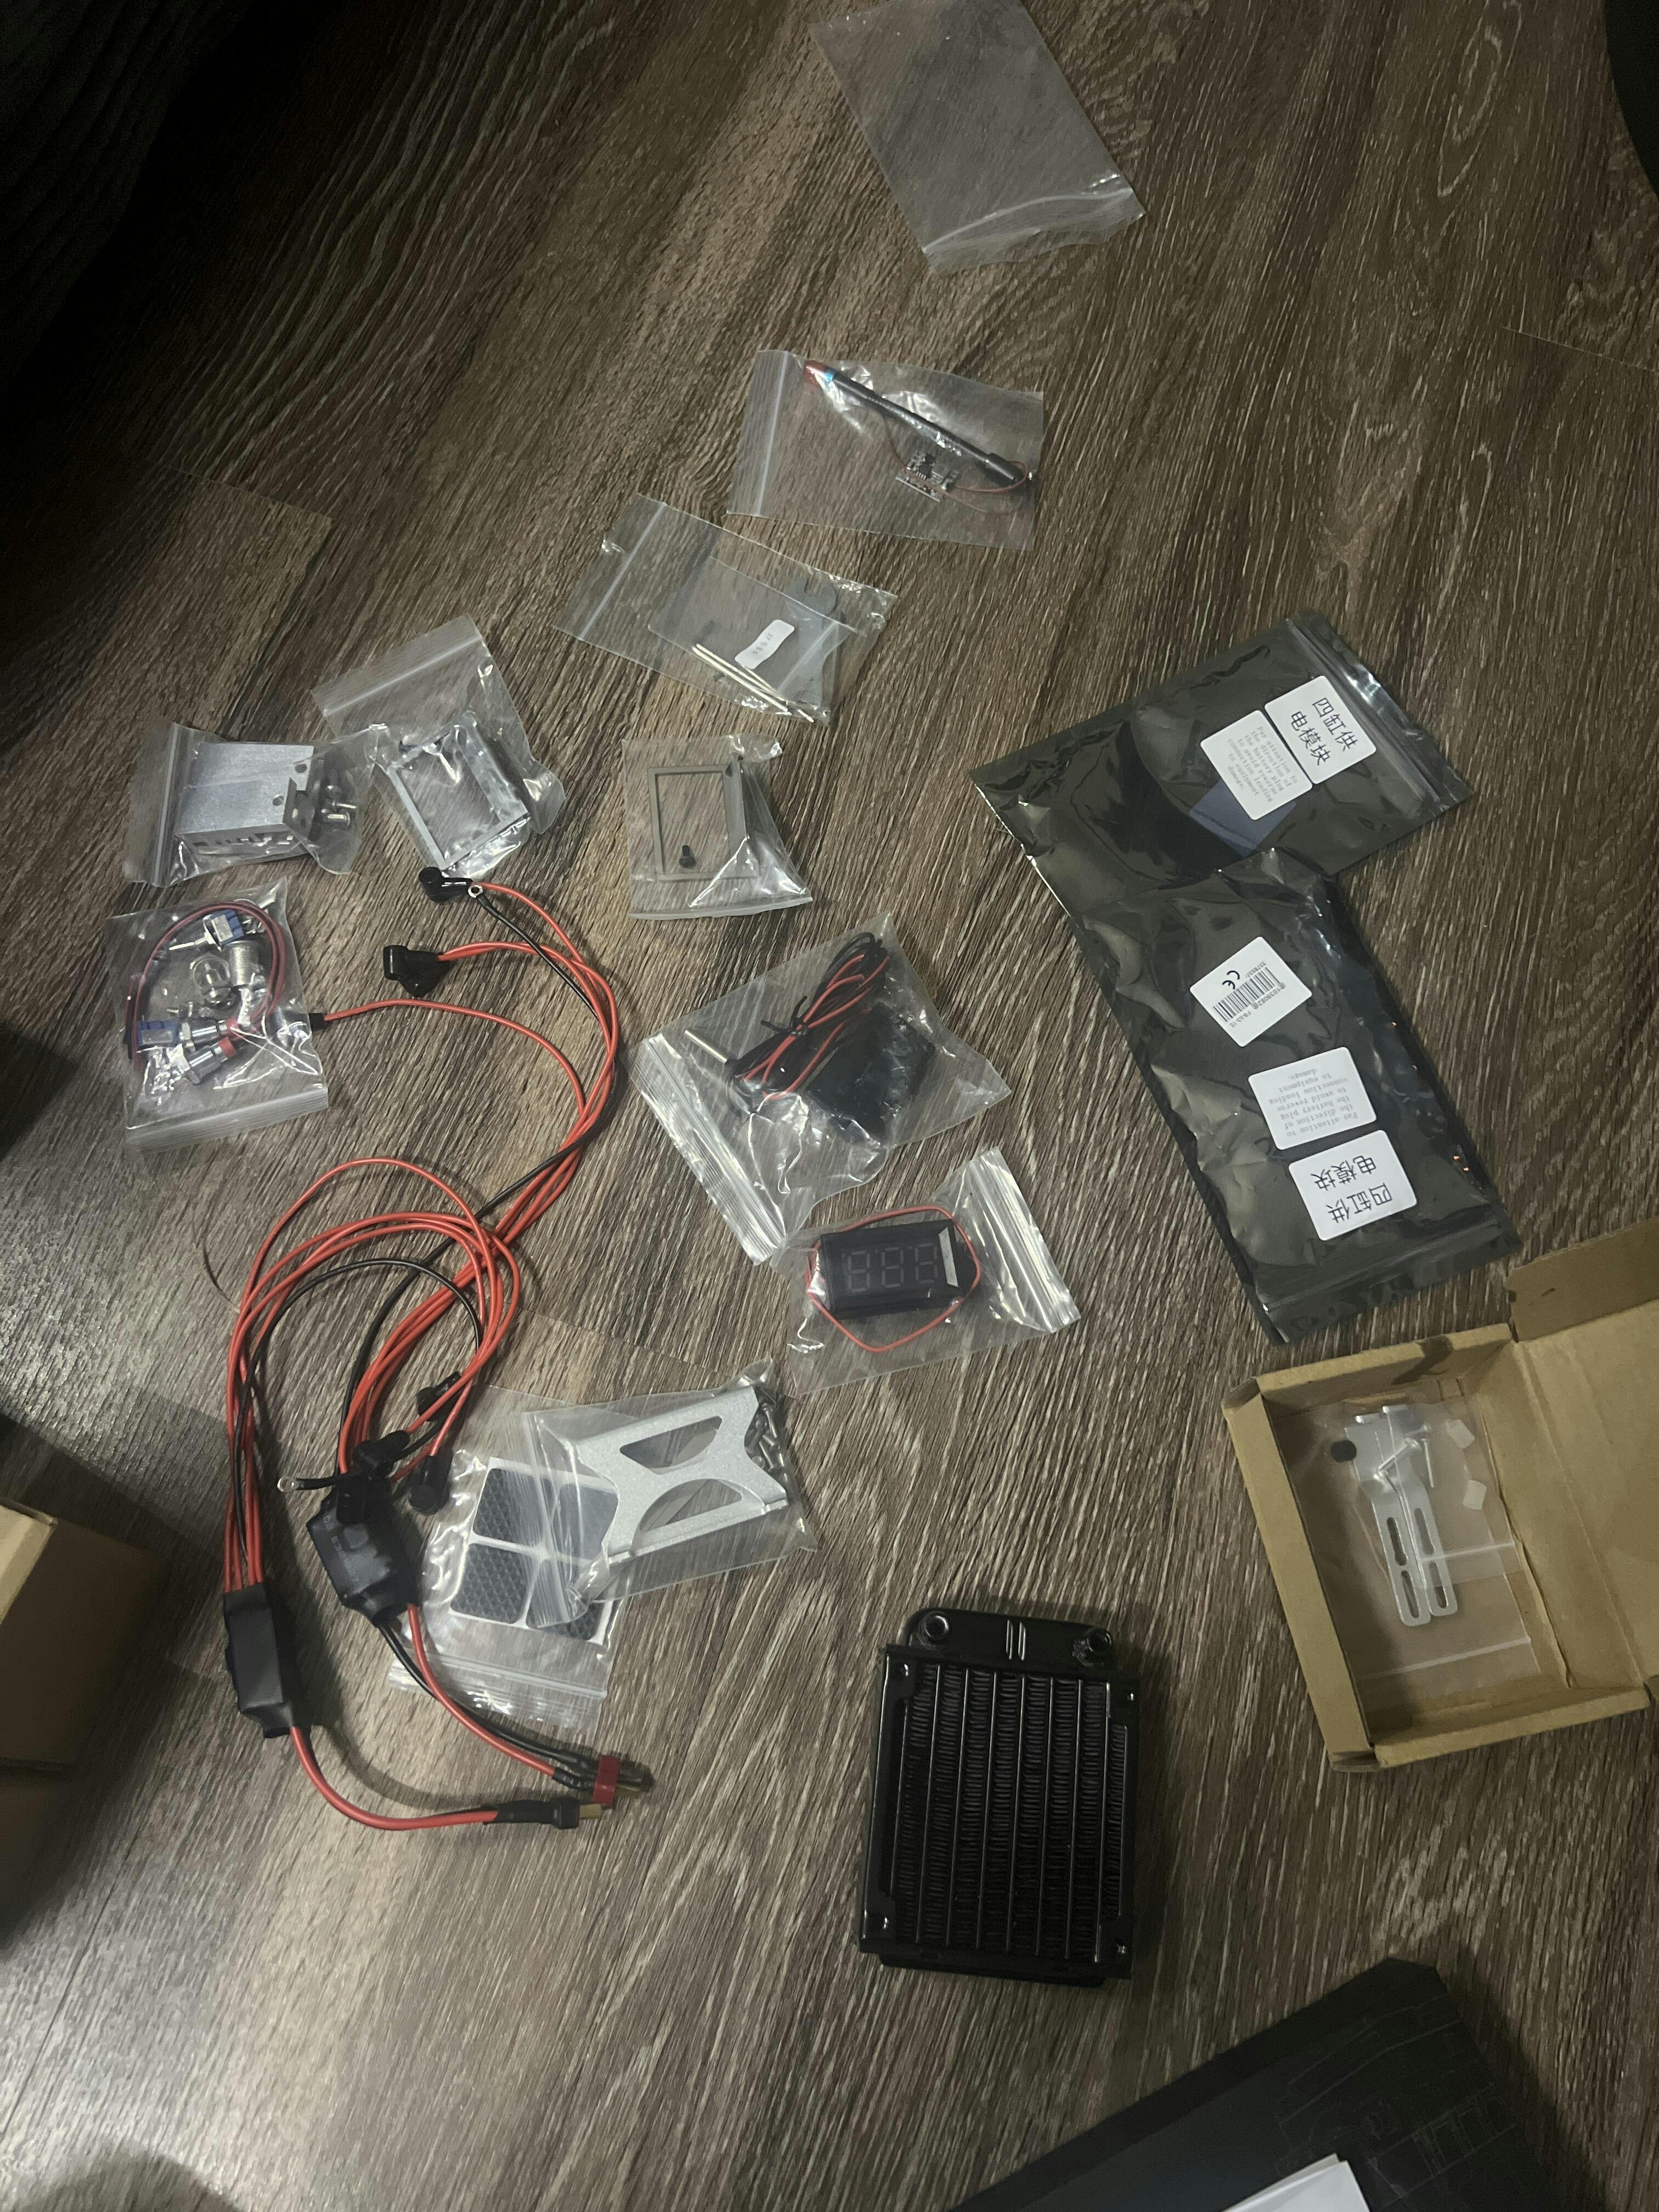
Missing power switch, missing start controller, missing starter motor connector, missing fan, missing Carp battery, missing start switch

Overall this is a nice kit. Very high tech looking parts that for the most part fit together well. But there are 2 black plastic pieces that you need to install that is nessisary for everything to turn & rotate, they are not to be found in the instructions. If the instructions were better I would have rated it higher.


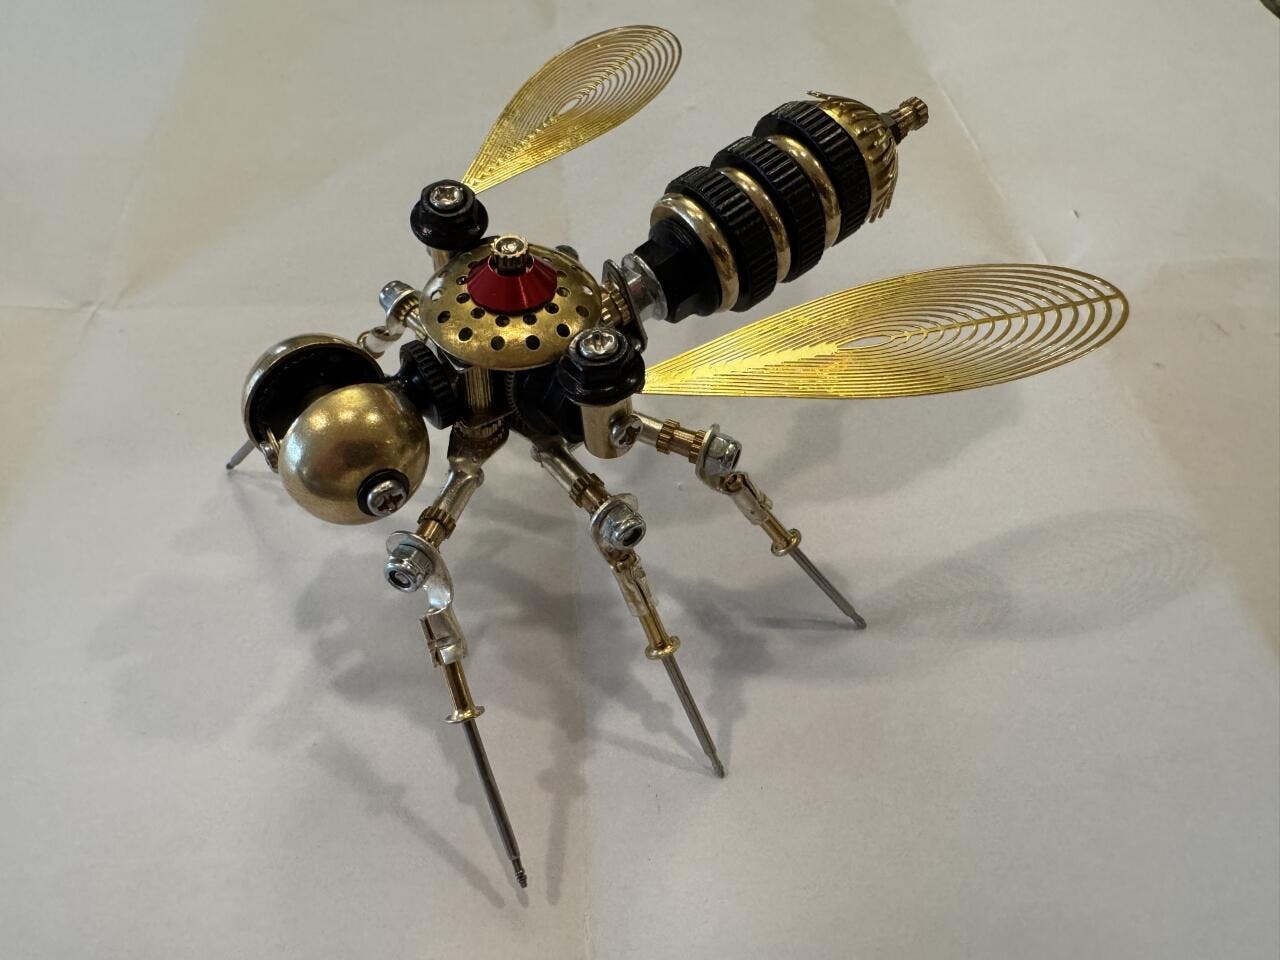
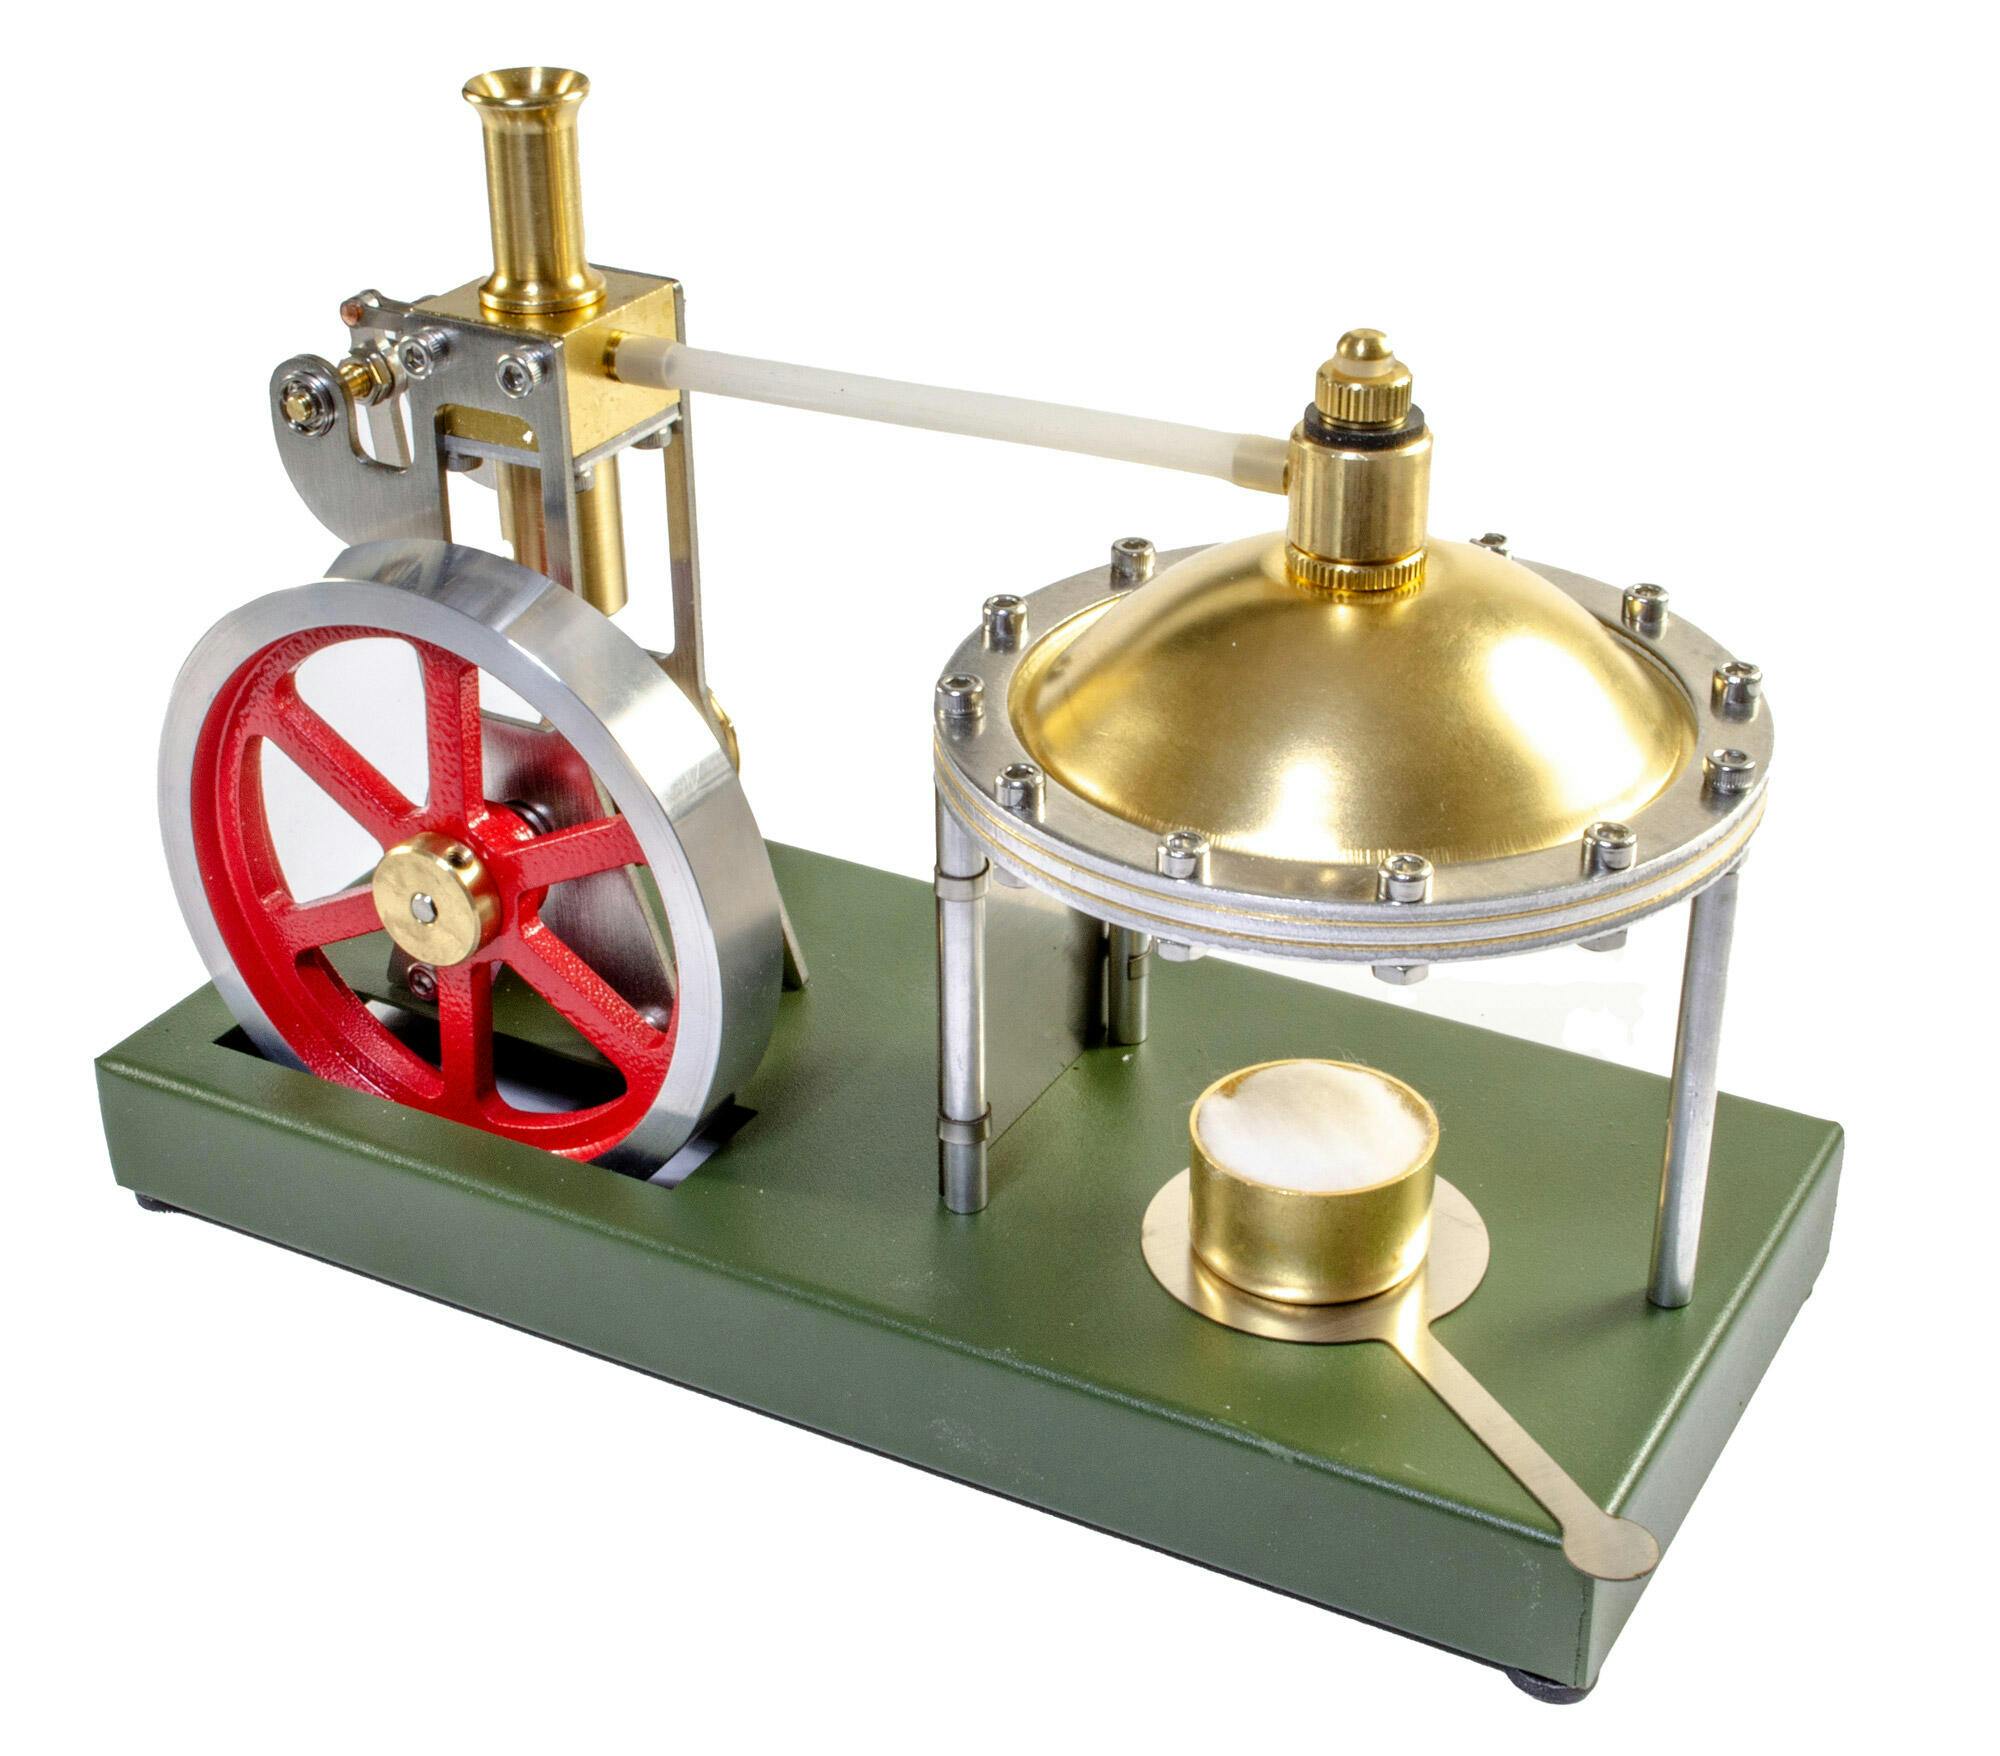
The actual kit is slightly different from the picture; the legs are different and mine came with a red-colored cap for the bee's back instead of gold. Compare my picture to the one in the listing. My kit was also missing the two screws that connect the "abdomen" to the "thorax". I was able to bend some nails to do the job, but those were pretty important pieces. Otherwise it was a fun kit, took about two hours to assemble for my first time doing a mechanical kit like this.
The kit comes with two very low-quality tools: a screwdriver and pliers. The pliers shattered in my hands as I was clamping one of the legs; the resulting blood blister is still healing as I write this. The screwdriver was ok but I wish they would not include wasteful throwaway tools. Use your own tools for this.

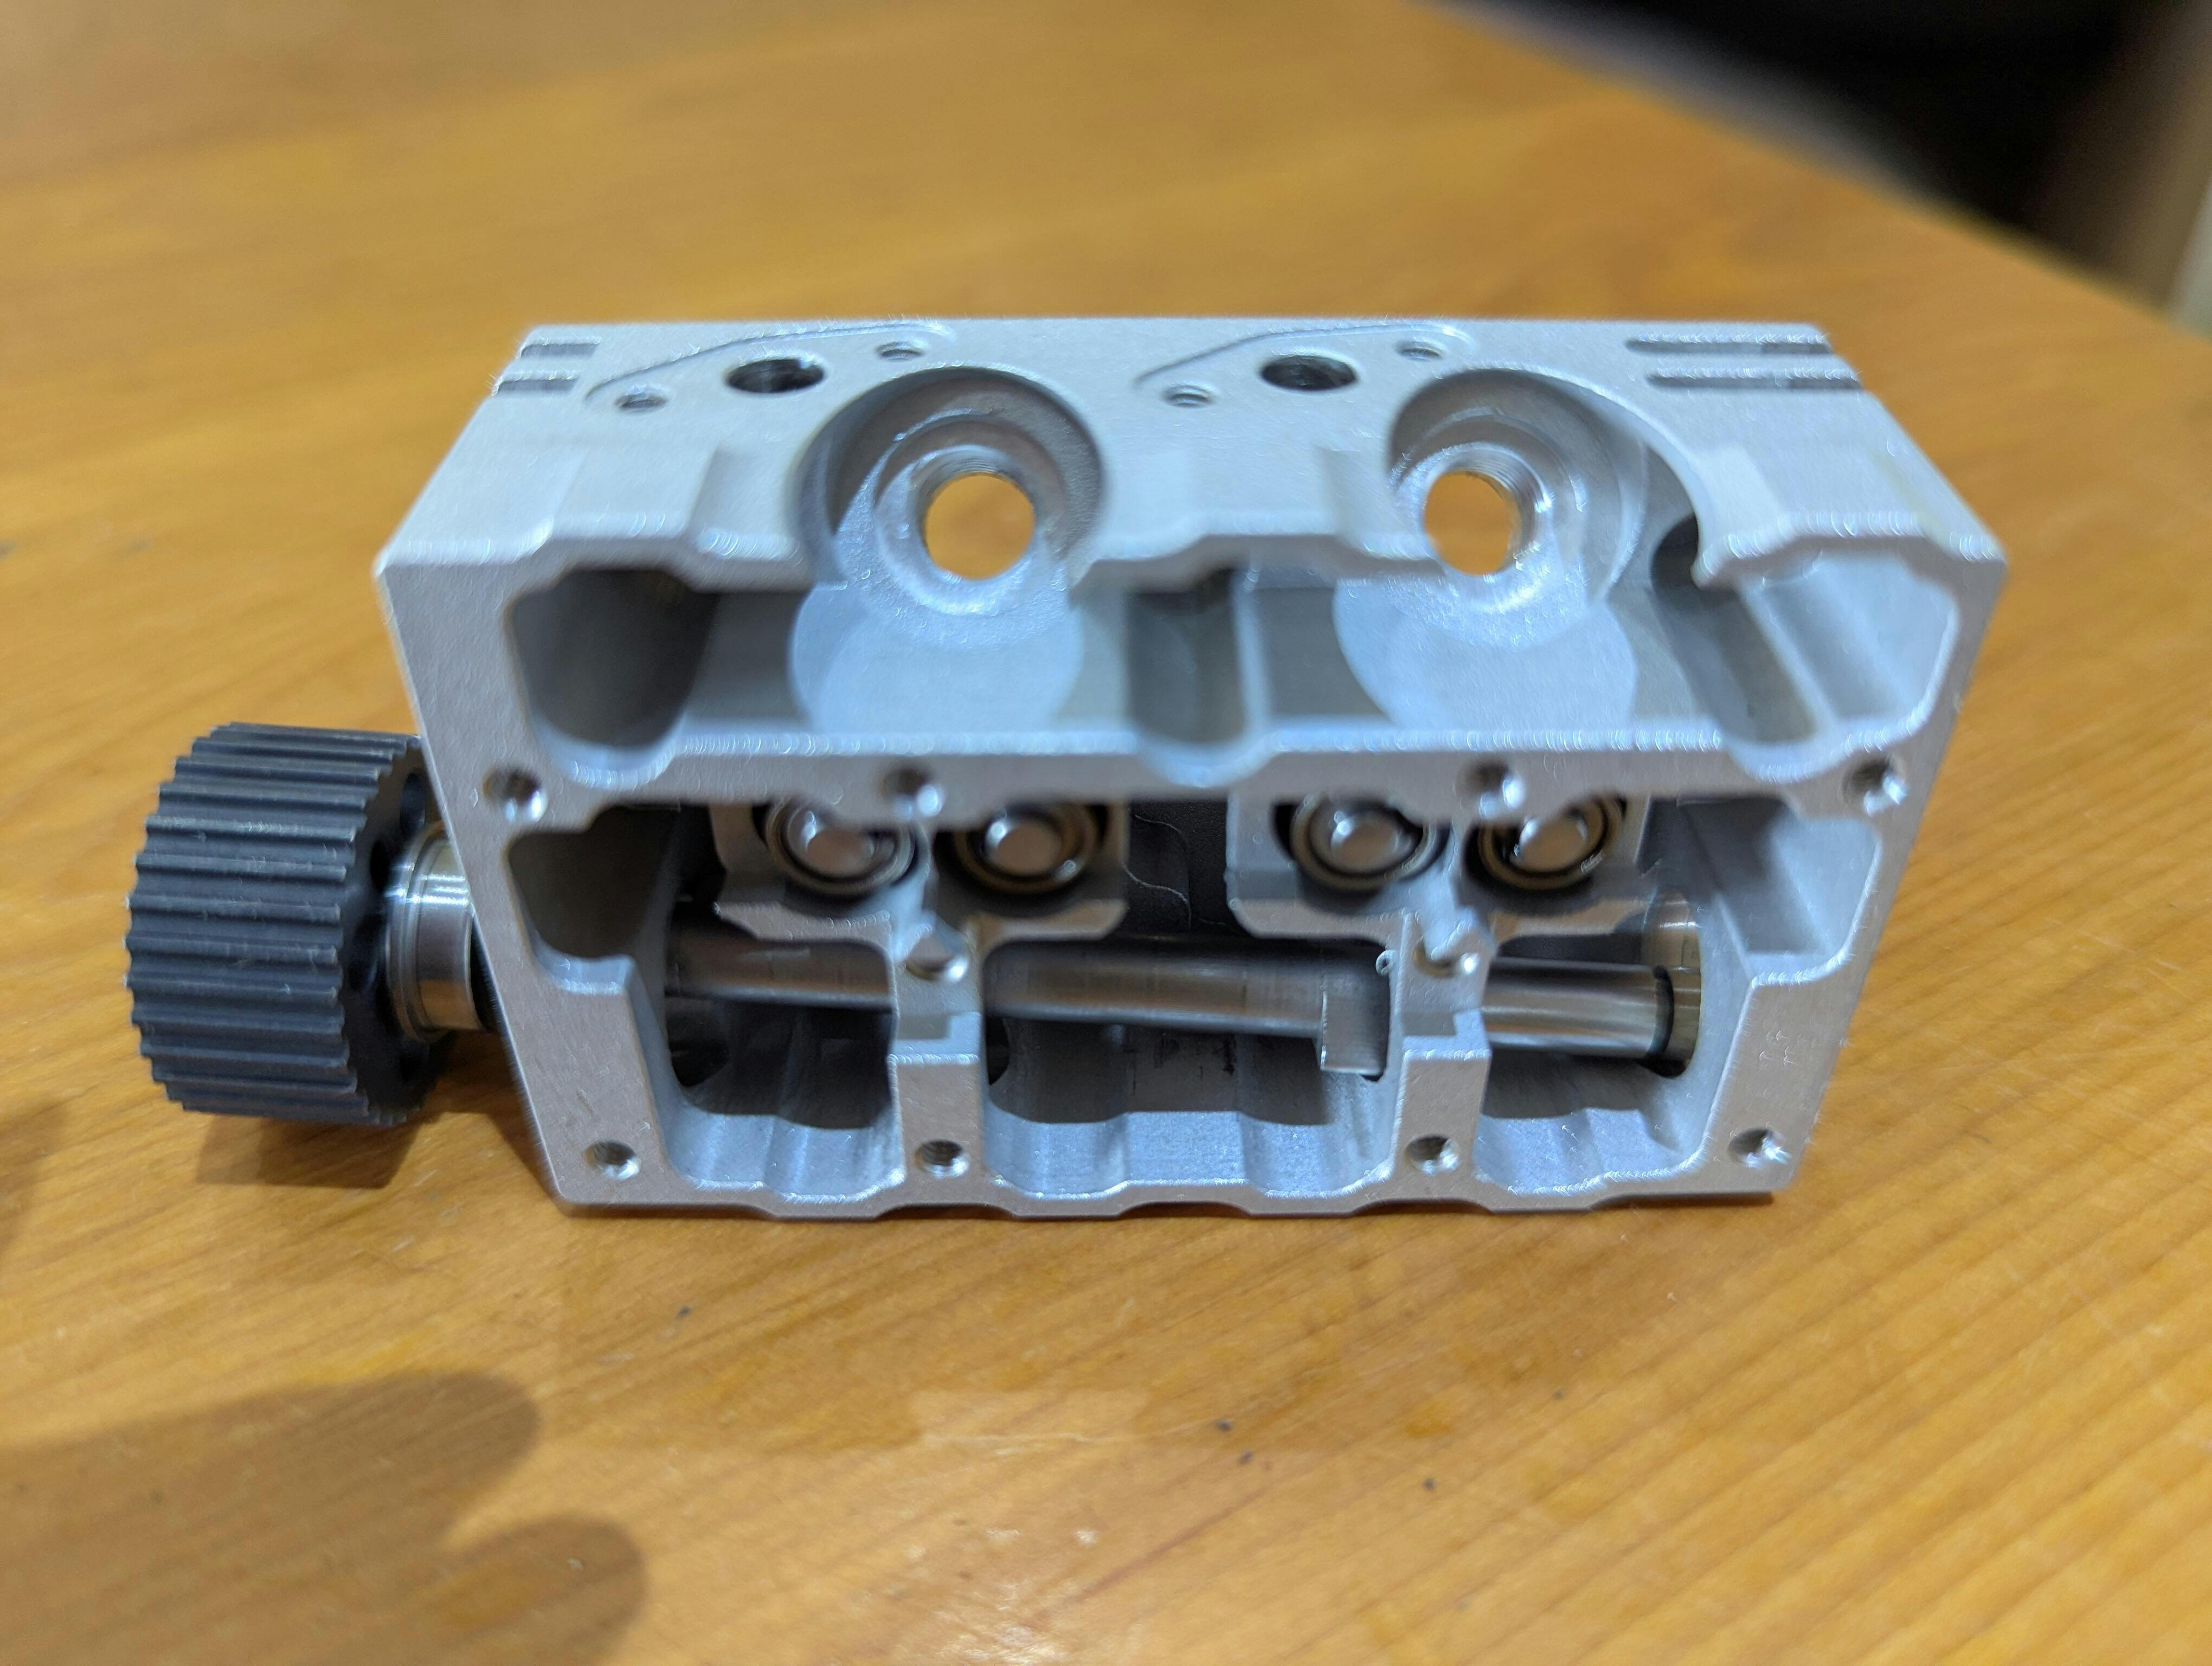
I bought one of these when they first came out a few years ago. I assembled it and ran it for a few minutes before it overheated. The cylinder head gasket and water pump functioned very poorly so I put the engine aside for over a year. Then I realized it was actually easy to make a head gasket. Starting with the head gasket I carried out a series of upgrades which are described below.
Cylinder head gasket:
I made the new gasket from 0.2 mm copper sheet. To do this I used the cylinder head as a drill guide: I started by putting the copper sheet on a wood block, then put the head on top, and drilled two holes through the head bolt holes through the sheet into the wood. I put the head screws in place which kept everything in alignment. I finished drilling all the head screw holes first (and put all the screws in place). Then I drilled through the pushrod holes to establish their locations. After removing the head, I carefully drilled out the pushrod holes to the same size as those in the original gasket. Then I put the partly finished head gasket on the block and traced the cylinder openings on the gasket with a marker pen from the bottom of the block. I drilled medium holes in the cylinder locations to avoid excessive distortion of the gasket. Then I put the gasket in a smooth jaw vice and filed the cylinder holes to size. I made sure a piston would pass through each hole with the gasket installed on the block which required some final adjustments. I drilled the water hole for the head and locating pin holes last. The original gasket had a slot for the water transfer passage, but it is only necessary to drill a hole in the gasket aligned with the hole in the head since there is a slot in the block. The last step was annealing the gasket by heating it red hot with a torch and allowing it to air cool. The gasket worked perfectly...
I also made an aluminum gasket. I did not use it yet, but it should work without annealing. I might try it later as an experiment.
Water pump:
As I explained earlier, the water pump on the L210 6 engine is worthless in my experience. I gutted the pump then I threaded a water fitting in the hole where the shaft was, and plugged the original water inlet with a screw. The pump now serves as the water outlet.
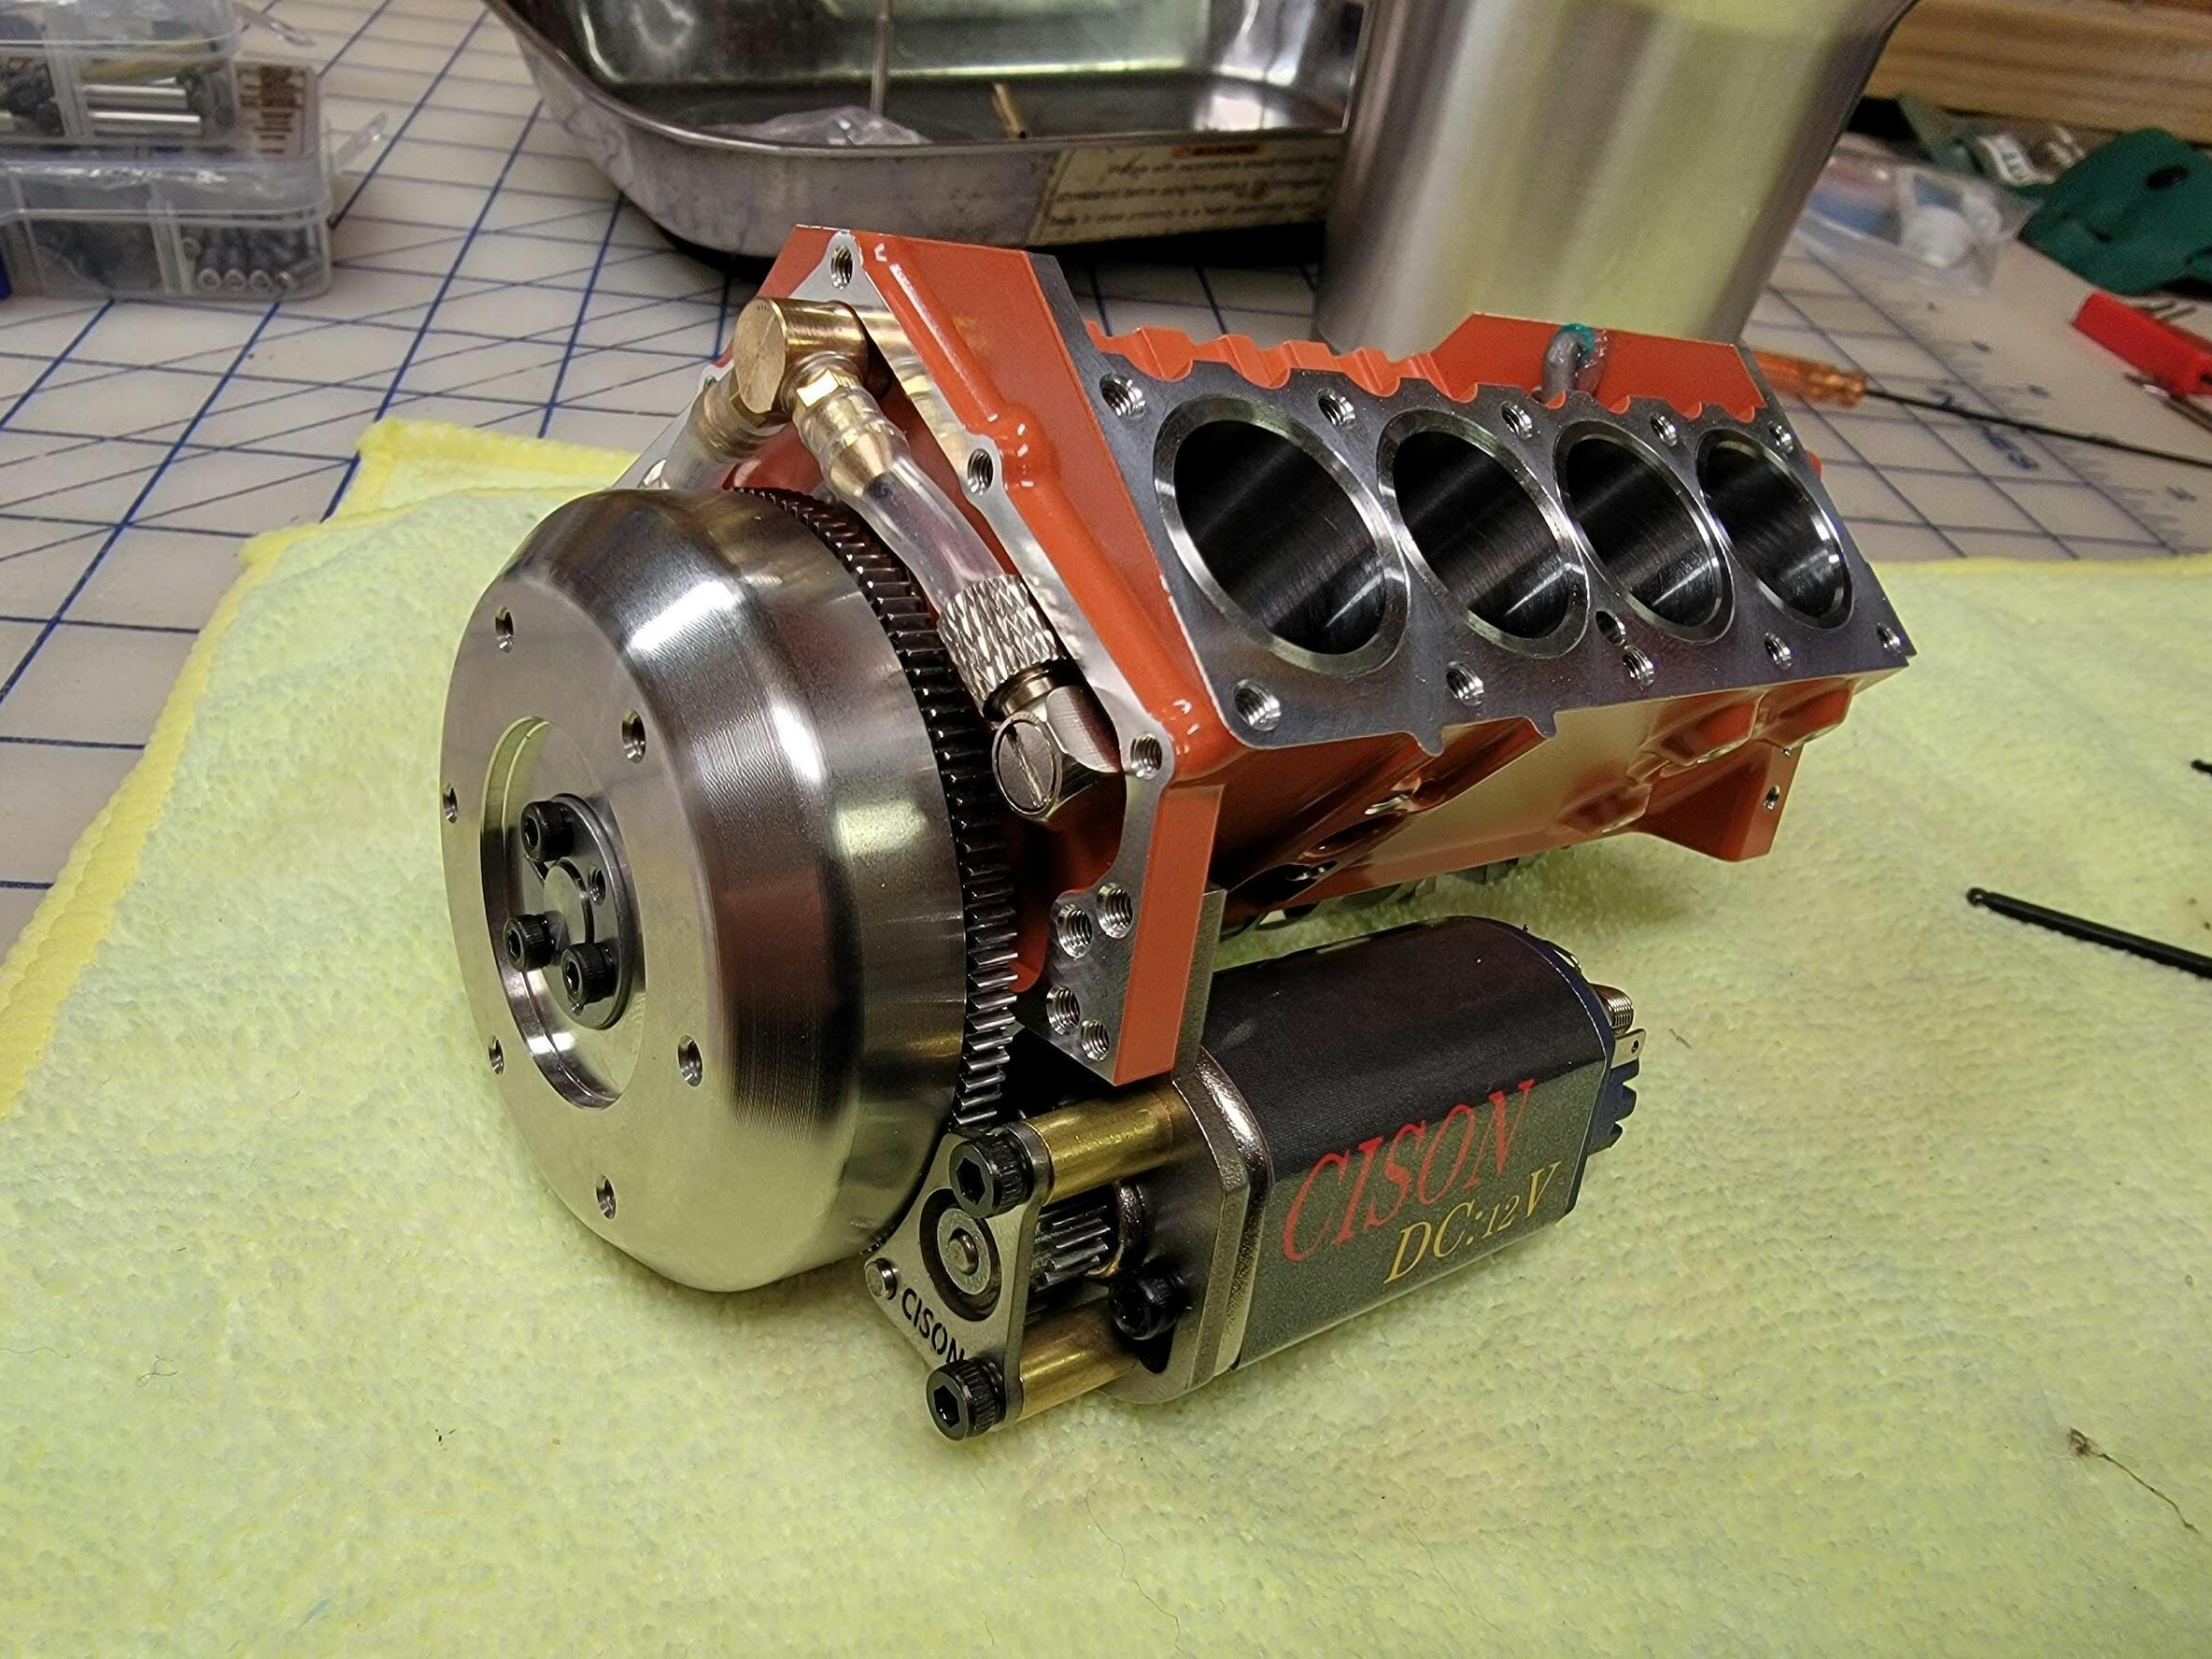
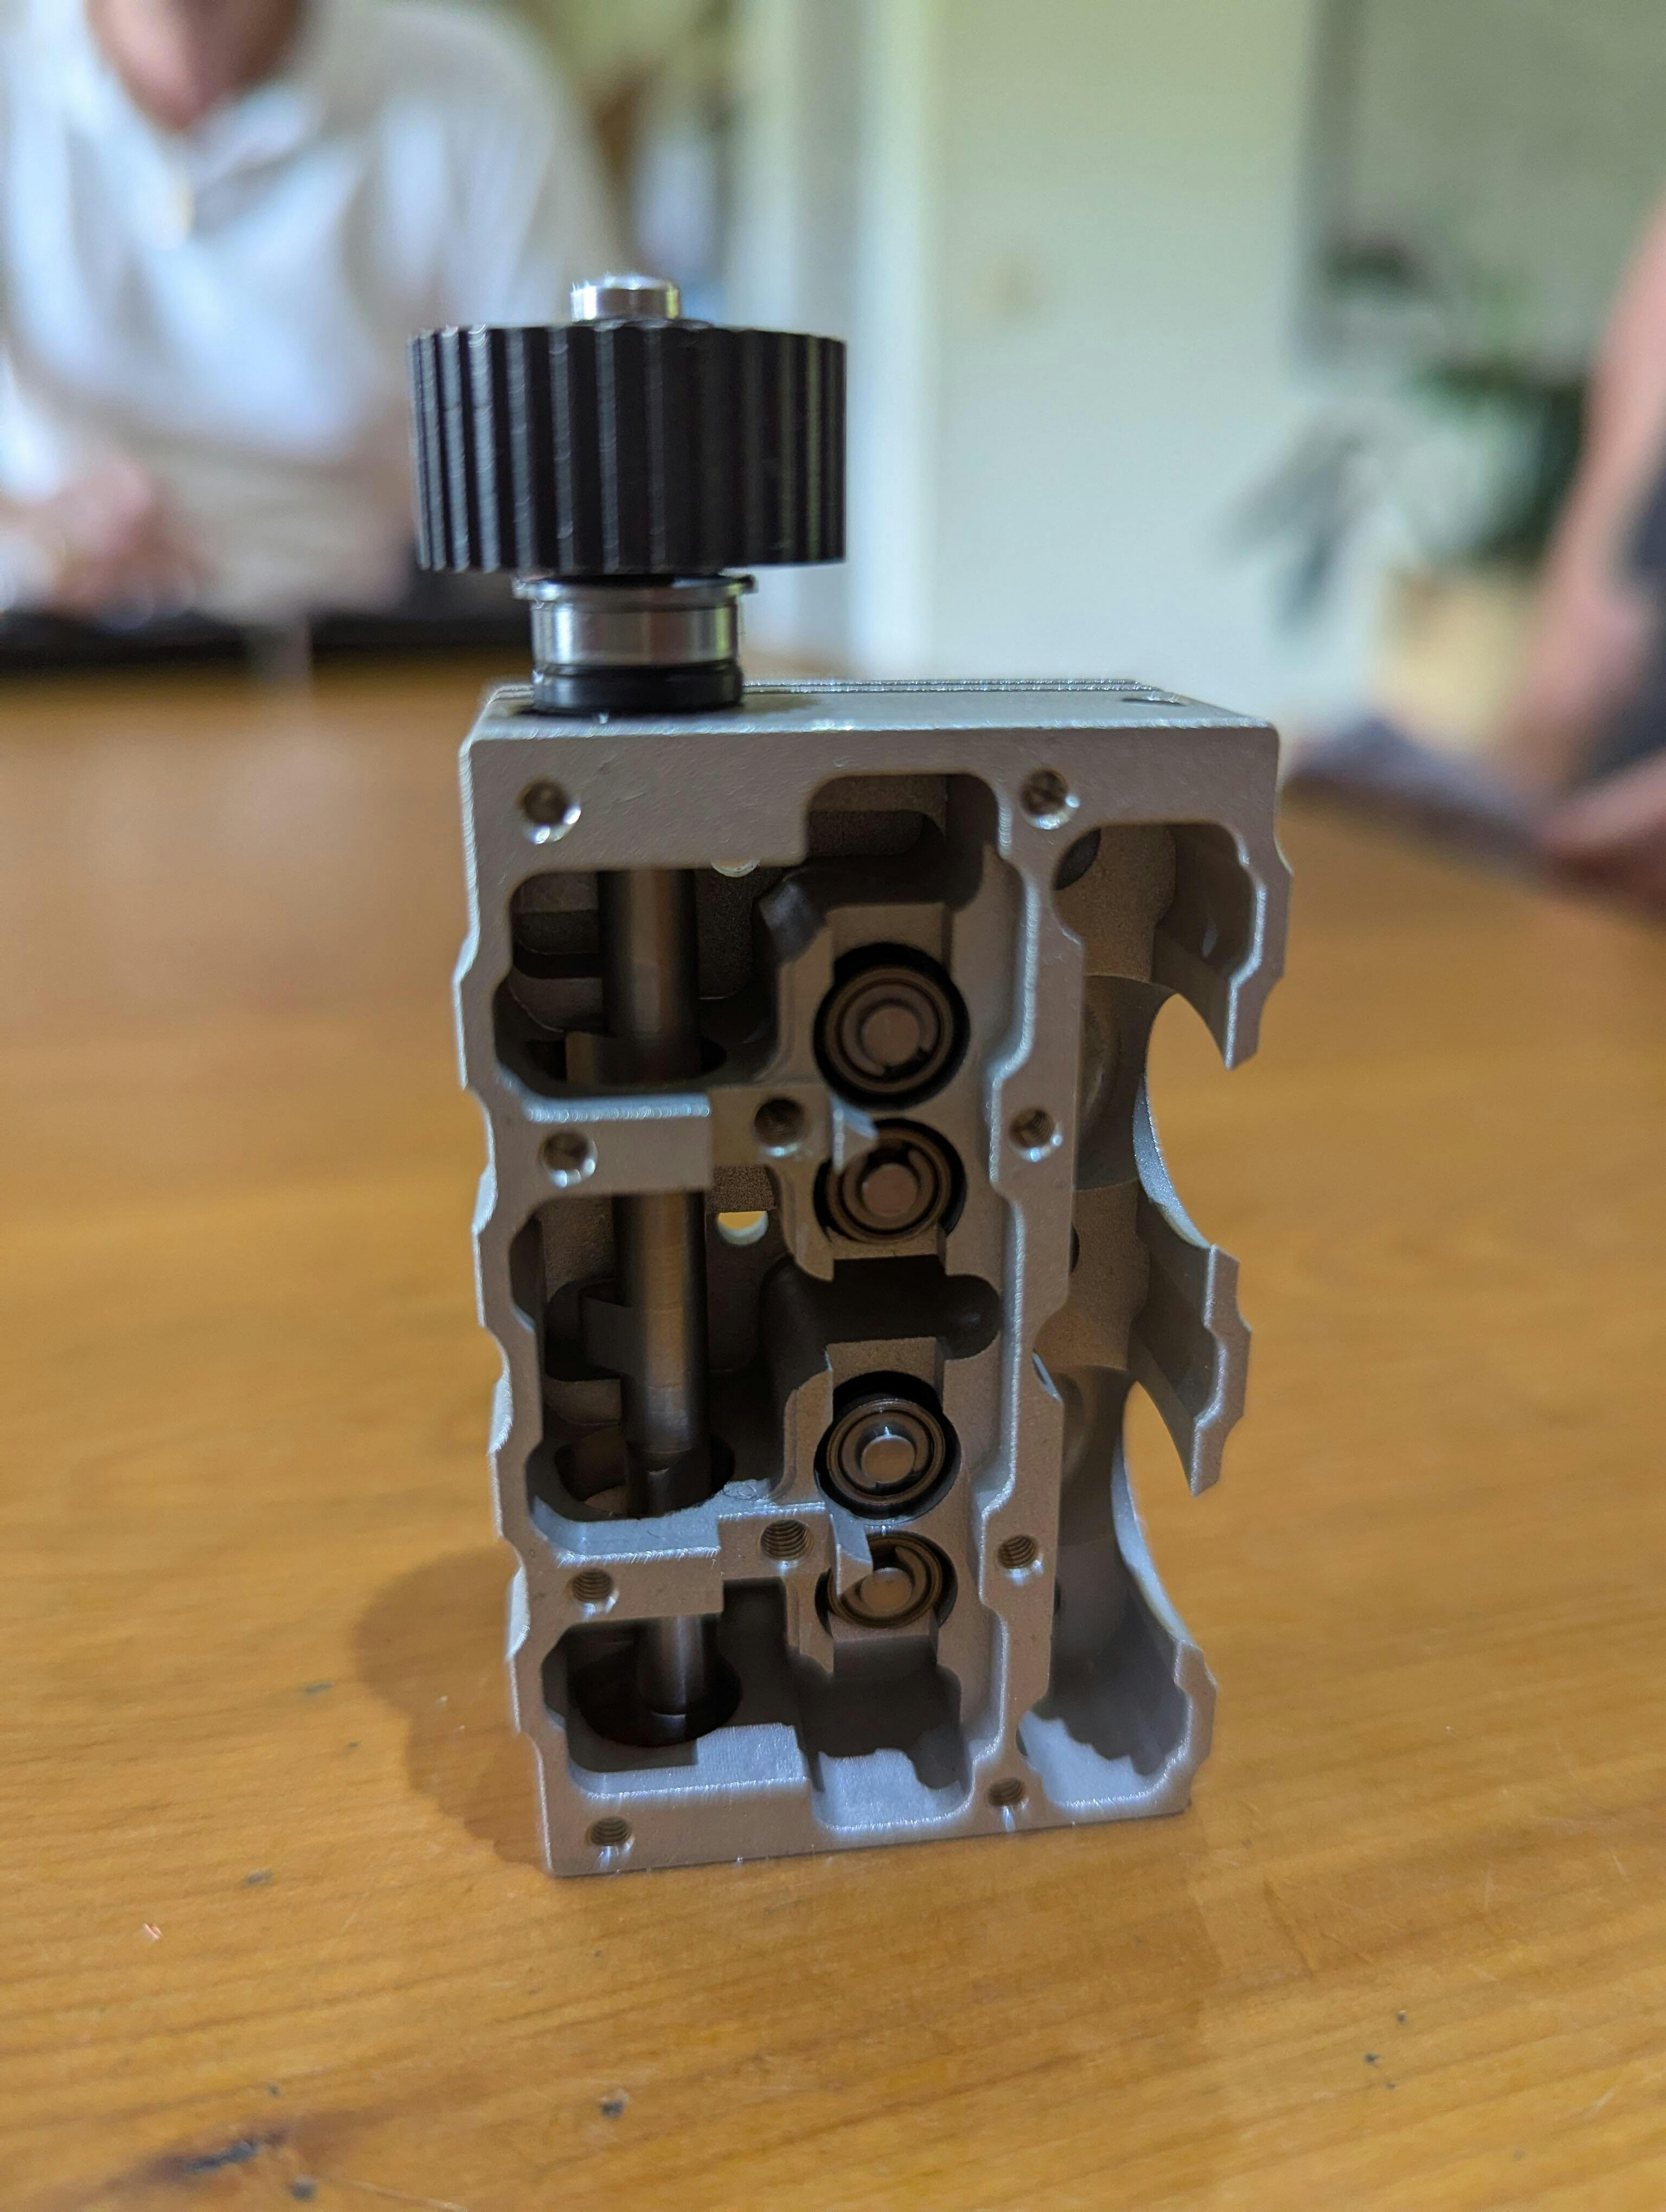
Install a generator:
I installed a Cison V8 generator as shown in the picture (it is attached to the oil pump support brackets). I prefer the V8 generator to the 4-cylinder generator because the small diameter pulley on the V8 generator shaft makes the generator spin faster which increases its output. I also liked the option of the internal diode board.
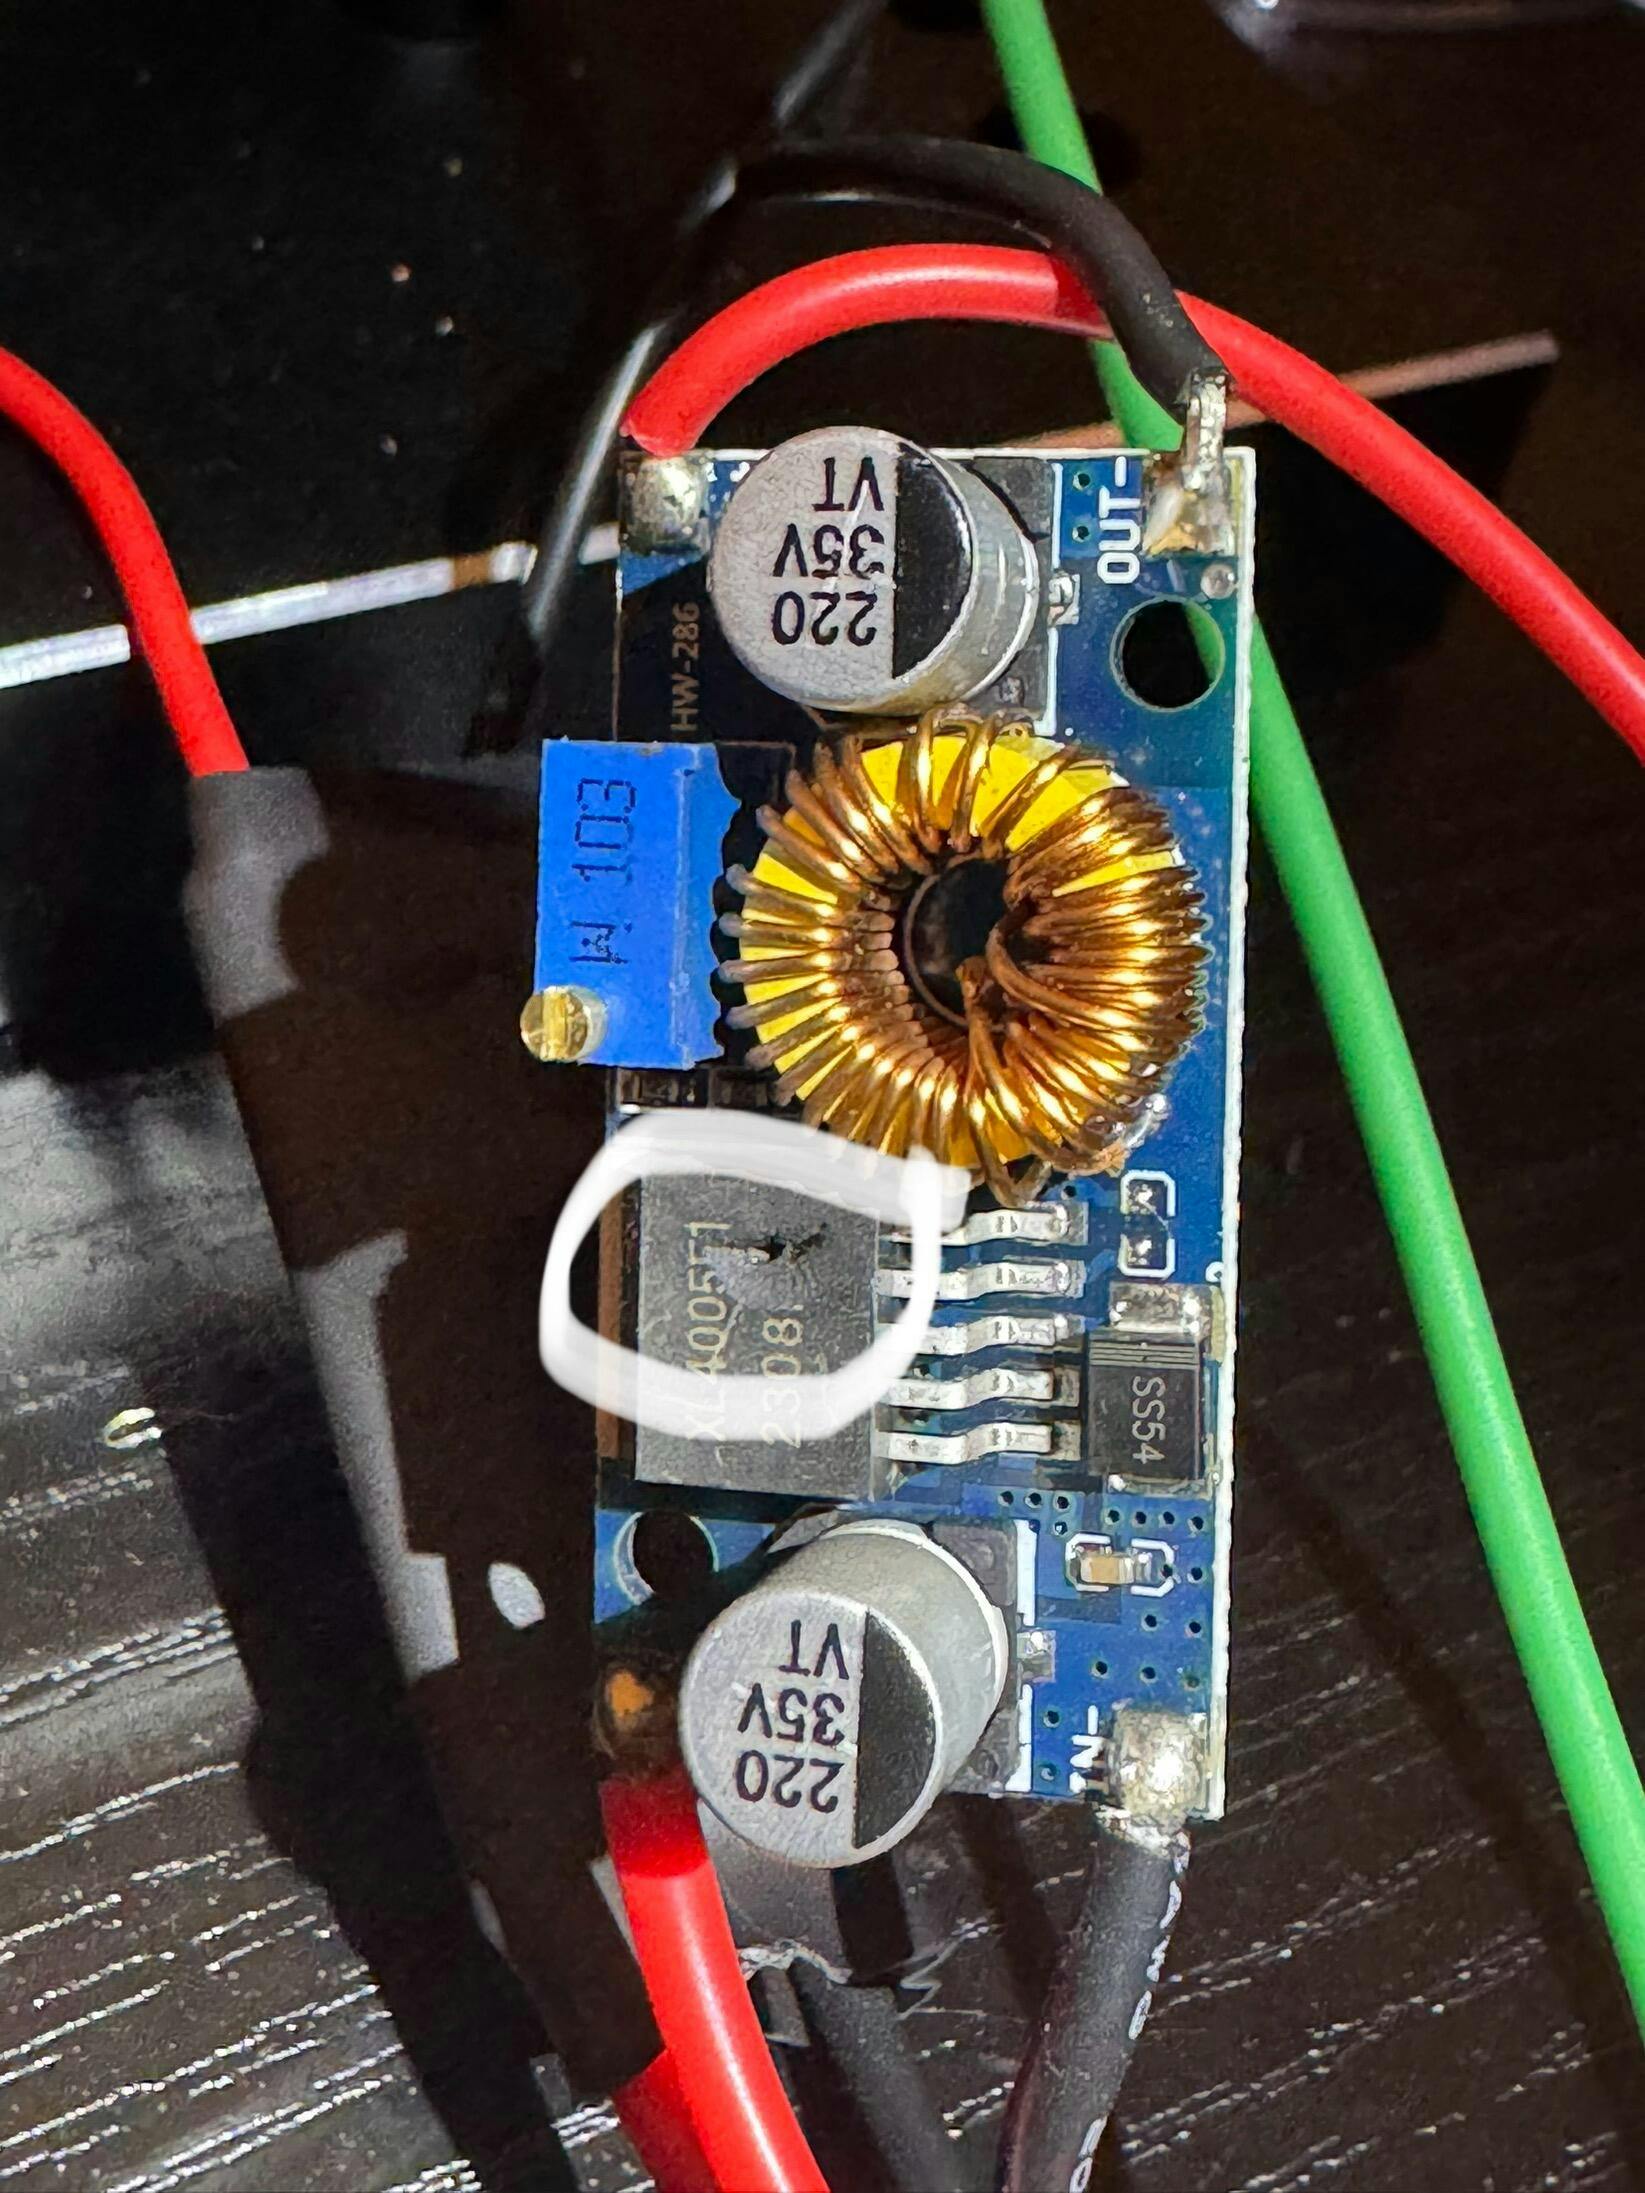
The generator is run using a 158 mm long toothed belt (found in a bag of various belts on Amazon). I also bought a 12-volt water pump and fan from Amazon and installed them using an adjustable voltage regulator set to 12 volts (also from Amazon). I installed another voltage regulator set to about 8.5 volts for the CD ignition that is also run off the generator. To start the engine, 12 volts from the starter relay is sent to the ignition voltage regulator through a diode. The diode prevents back voltage from the generator going to the starter motor once the engine is running (at normal operating speeds the generator supplies all the electrical power needed). The voltage regulators are needed since the generator can produce more than 15 volts.
Ignition wires:
The ignition wires are quite ugly. To fix this, I shortened the wire terminals at the distributor and custom cut each wire to length. At the distributor I carefully removed the two layers of black tubing from each wire down to the metal terminals using a hobby knife. I was careful not to damage the red wire insulation. I then put shrink tubing over each wire including the terminals; bent the wires (and shrink wrap) at 90 degrees, and set the tubing with a heat gun.
Radiator:
With the distributor wires under control, I upsized the radiator from a 40mm x 40mm unit to a 60mm x 60mm unit. Originally, I put the small radiator next to the distributor wires, but I was able to install the bigger radiator in front of the distributor after the distributor modifications.
I made a reservoir tank out of ¾ inch copper pipe and fittings. To close off the reservoir I bought a cap and threaded neck intended to restore antique oil lamps from eBay. The picture shows how this was done. The reservoir extends above the radiator which ensures that the radiator and engine are always completely full of water.
Result:
The engine runs well without the battery once started. There are no oil or water leaks but still a slight tendency towards overheating when run at high speed. A bigger radiator should cure this. Overall, the result is satisfactory so it is too bad these are being discontinued, maybe they will be replaced with a better version. In any case, I bought another which I will build and modify like this one.


Easy to install. After installing, it looks like the oil is moving faster through the oil line. In addition, I noticed the bubbles in the oil line have disappeared, I am not sure if it was the gears or just better sealing during the gear change. Overall, I think these are well worth the cost and I do recommend them.


The service from this company was outstanding. I placed my order and emailed regarding an update I wanted. I got an immediate respond and they completely satisfied by request. The product is as advertised and of very high quality. They also used the discounts that are available from their Facebook and website. Highly recommended


This was my first engine model and it was a real pleasure to put together. Some of the screws were a bit tricky but nothing some masking tape and tweezers couldn't handle. Really happy with the results. It sits proudly on my book shelf behind me, displayed on all my work calls. It took an evening but I imagine some more experienced folks would make better time. I had no real complaints. Some of the pieces will have small areas where the paint is missing due to the printed strata. The instructions were only slightly confusing in a few places. Overall, a real winner. I look forward to putting some of the other engines together!


Nice looking product , easy assembly

The engine arrived and I was SO EXCITED to give it to my grandson today for his birthday.
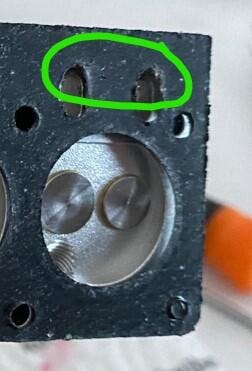
We got it partly assembled but could go no further. Part 34 and Part 27 X 2 will NOT go into Part 55, the cylinder cap. My son-in-law measured the hole and said it is too small by a half ml. It's very close and we know that it's meant to be a tight fit but it's physically impossible to insert it.
I am very disappointed and I hope you can help us by fixing the situation. I have attached pictures for your information.


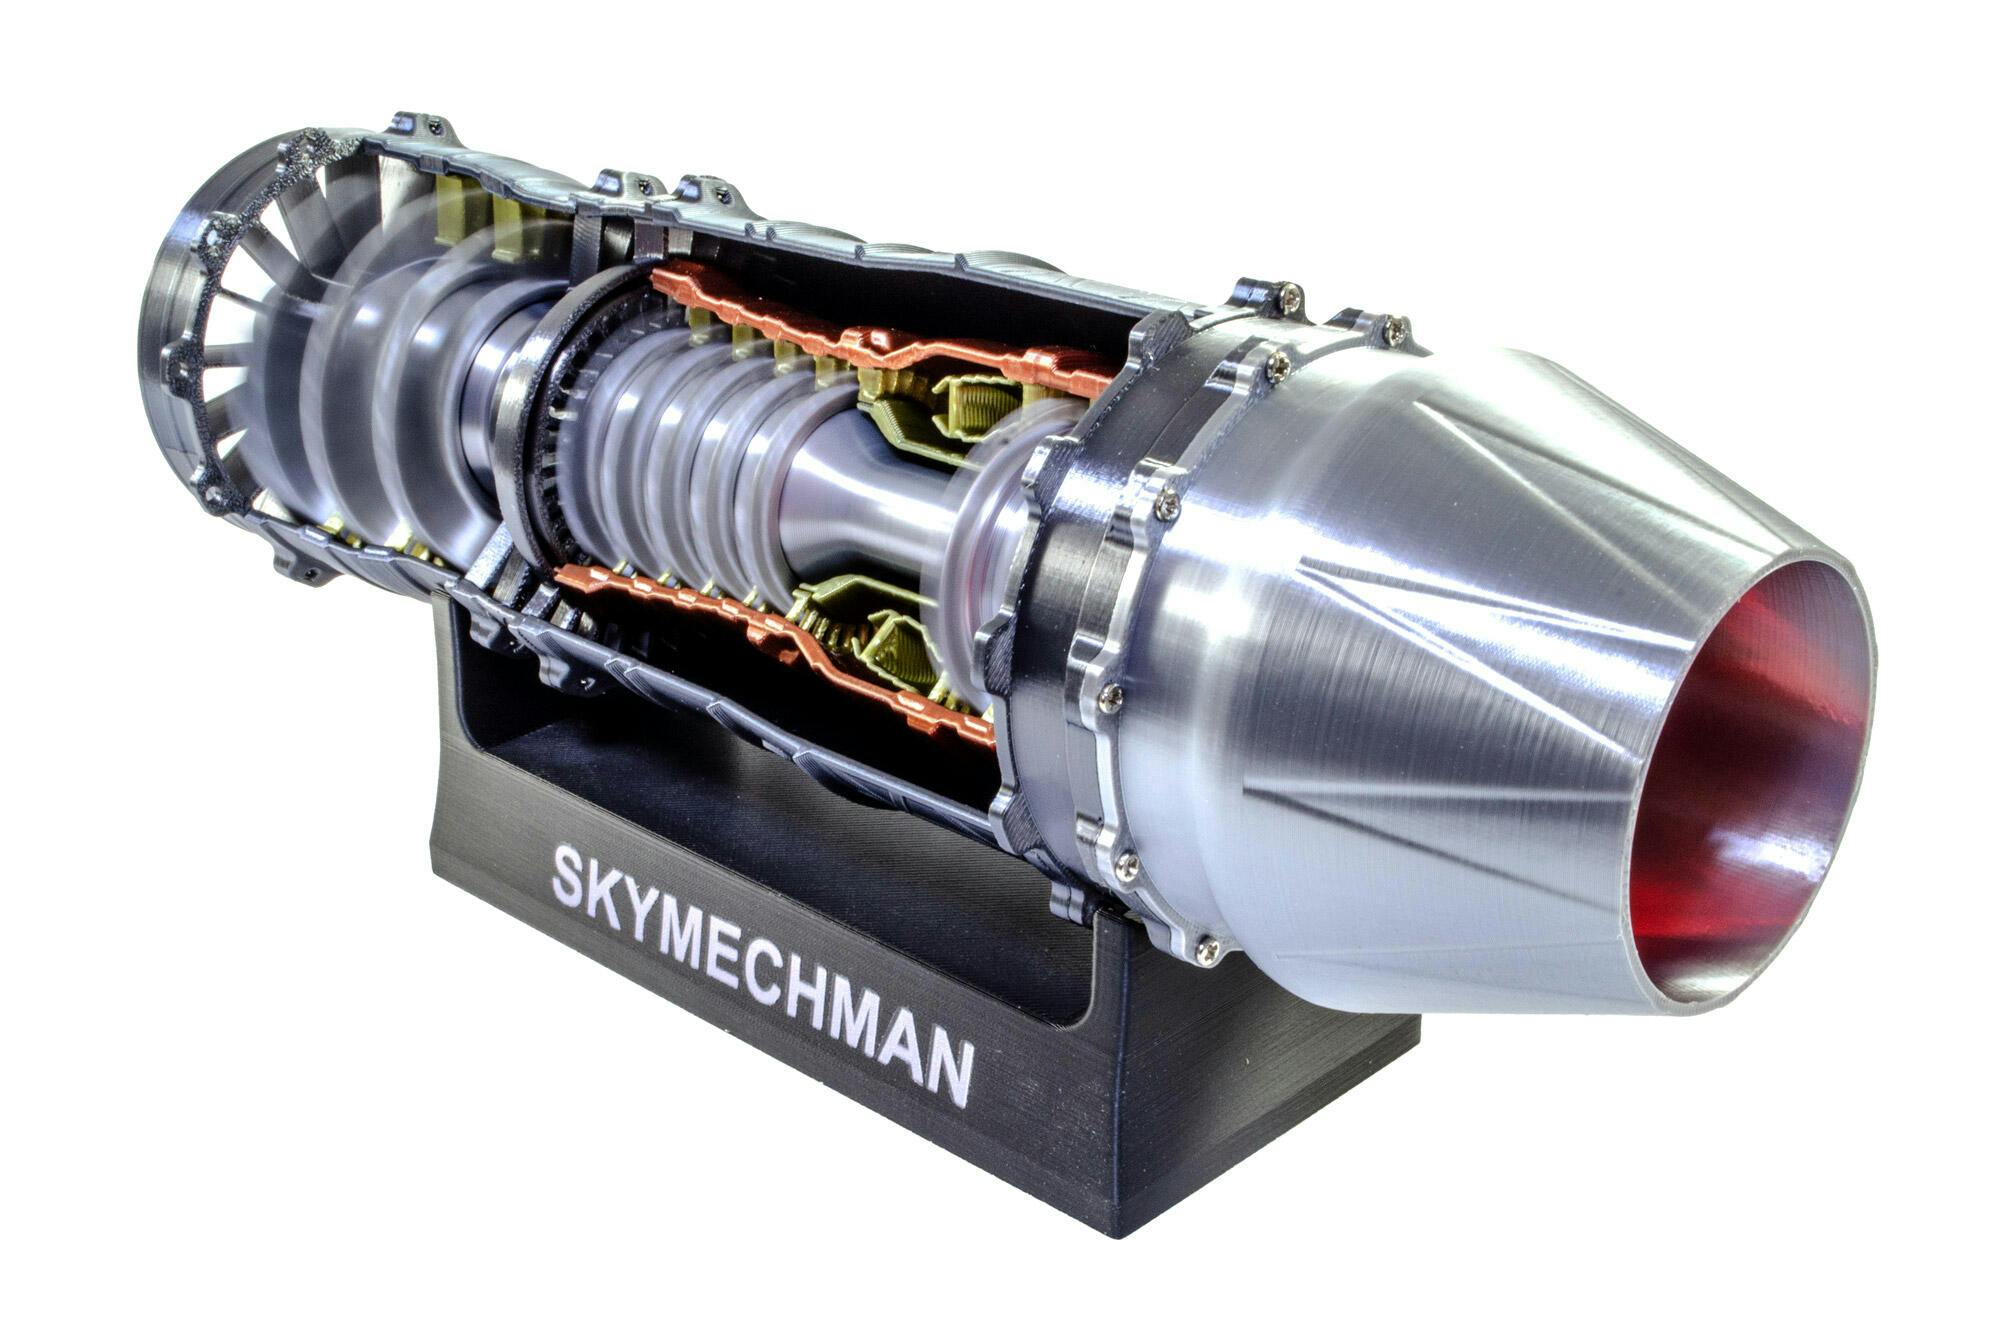
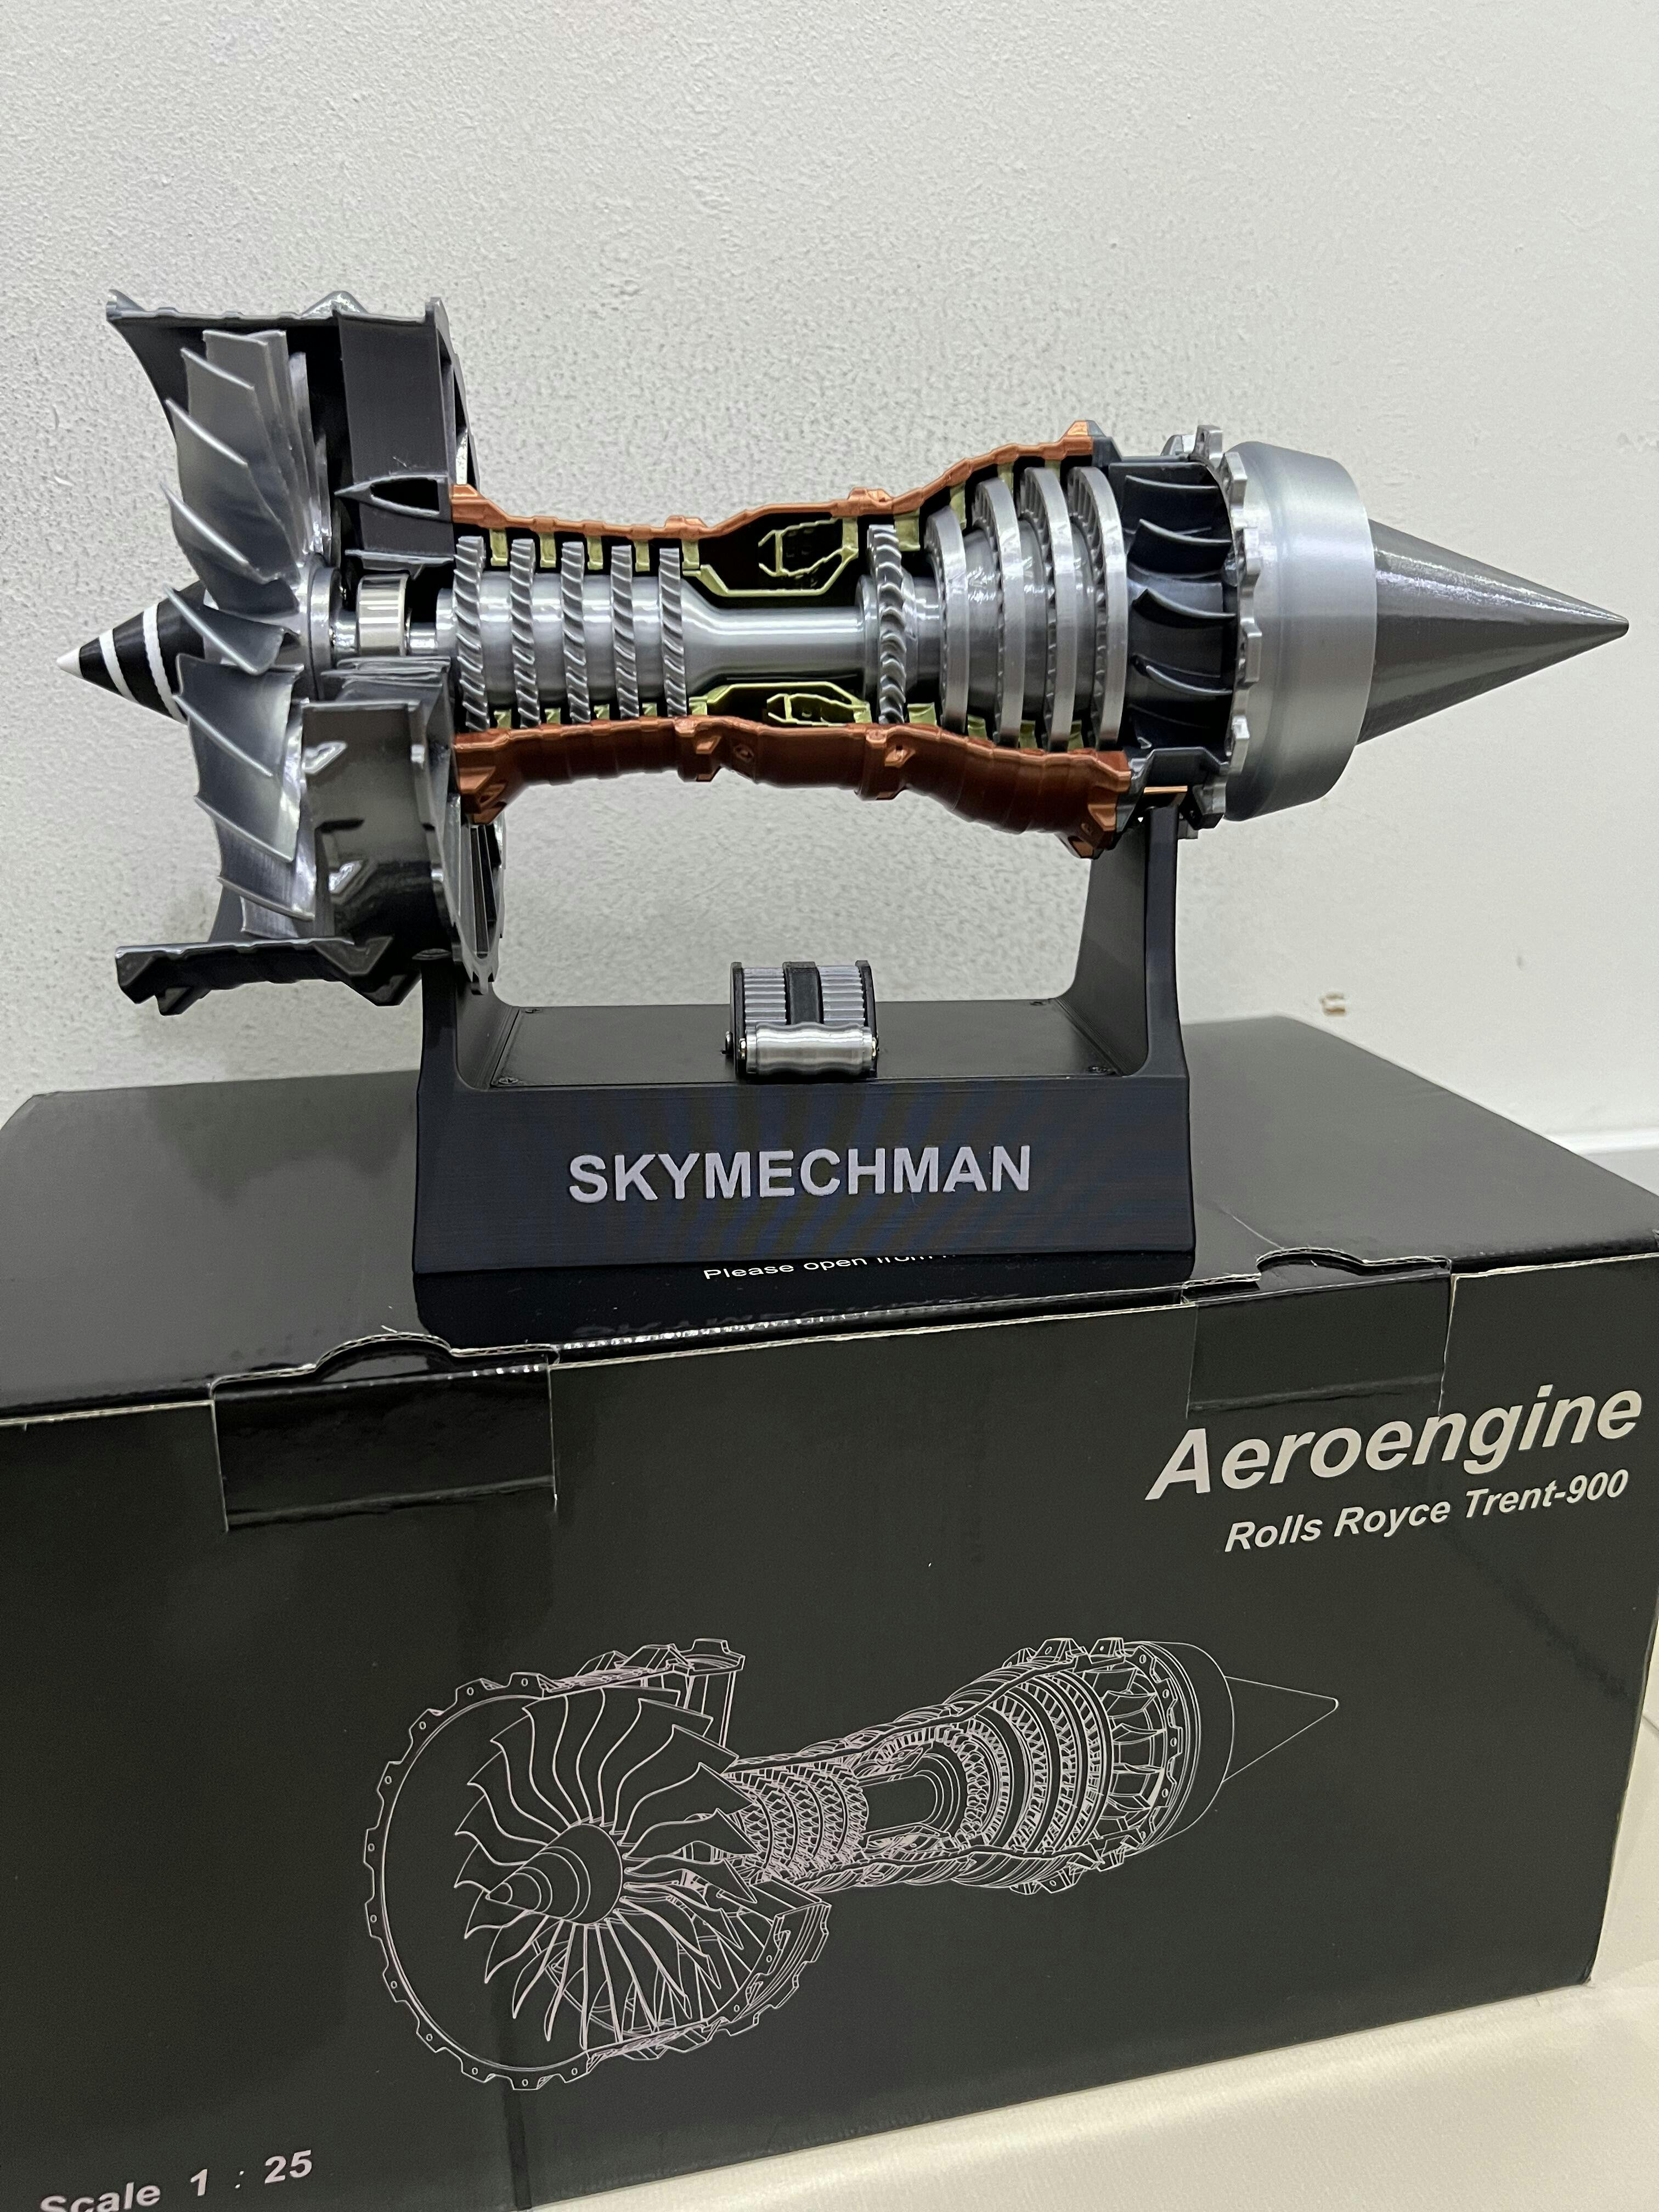
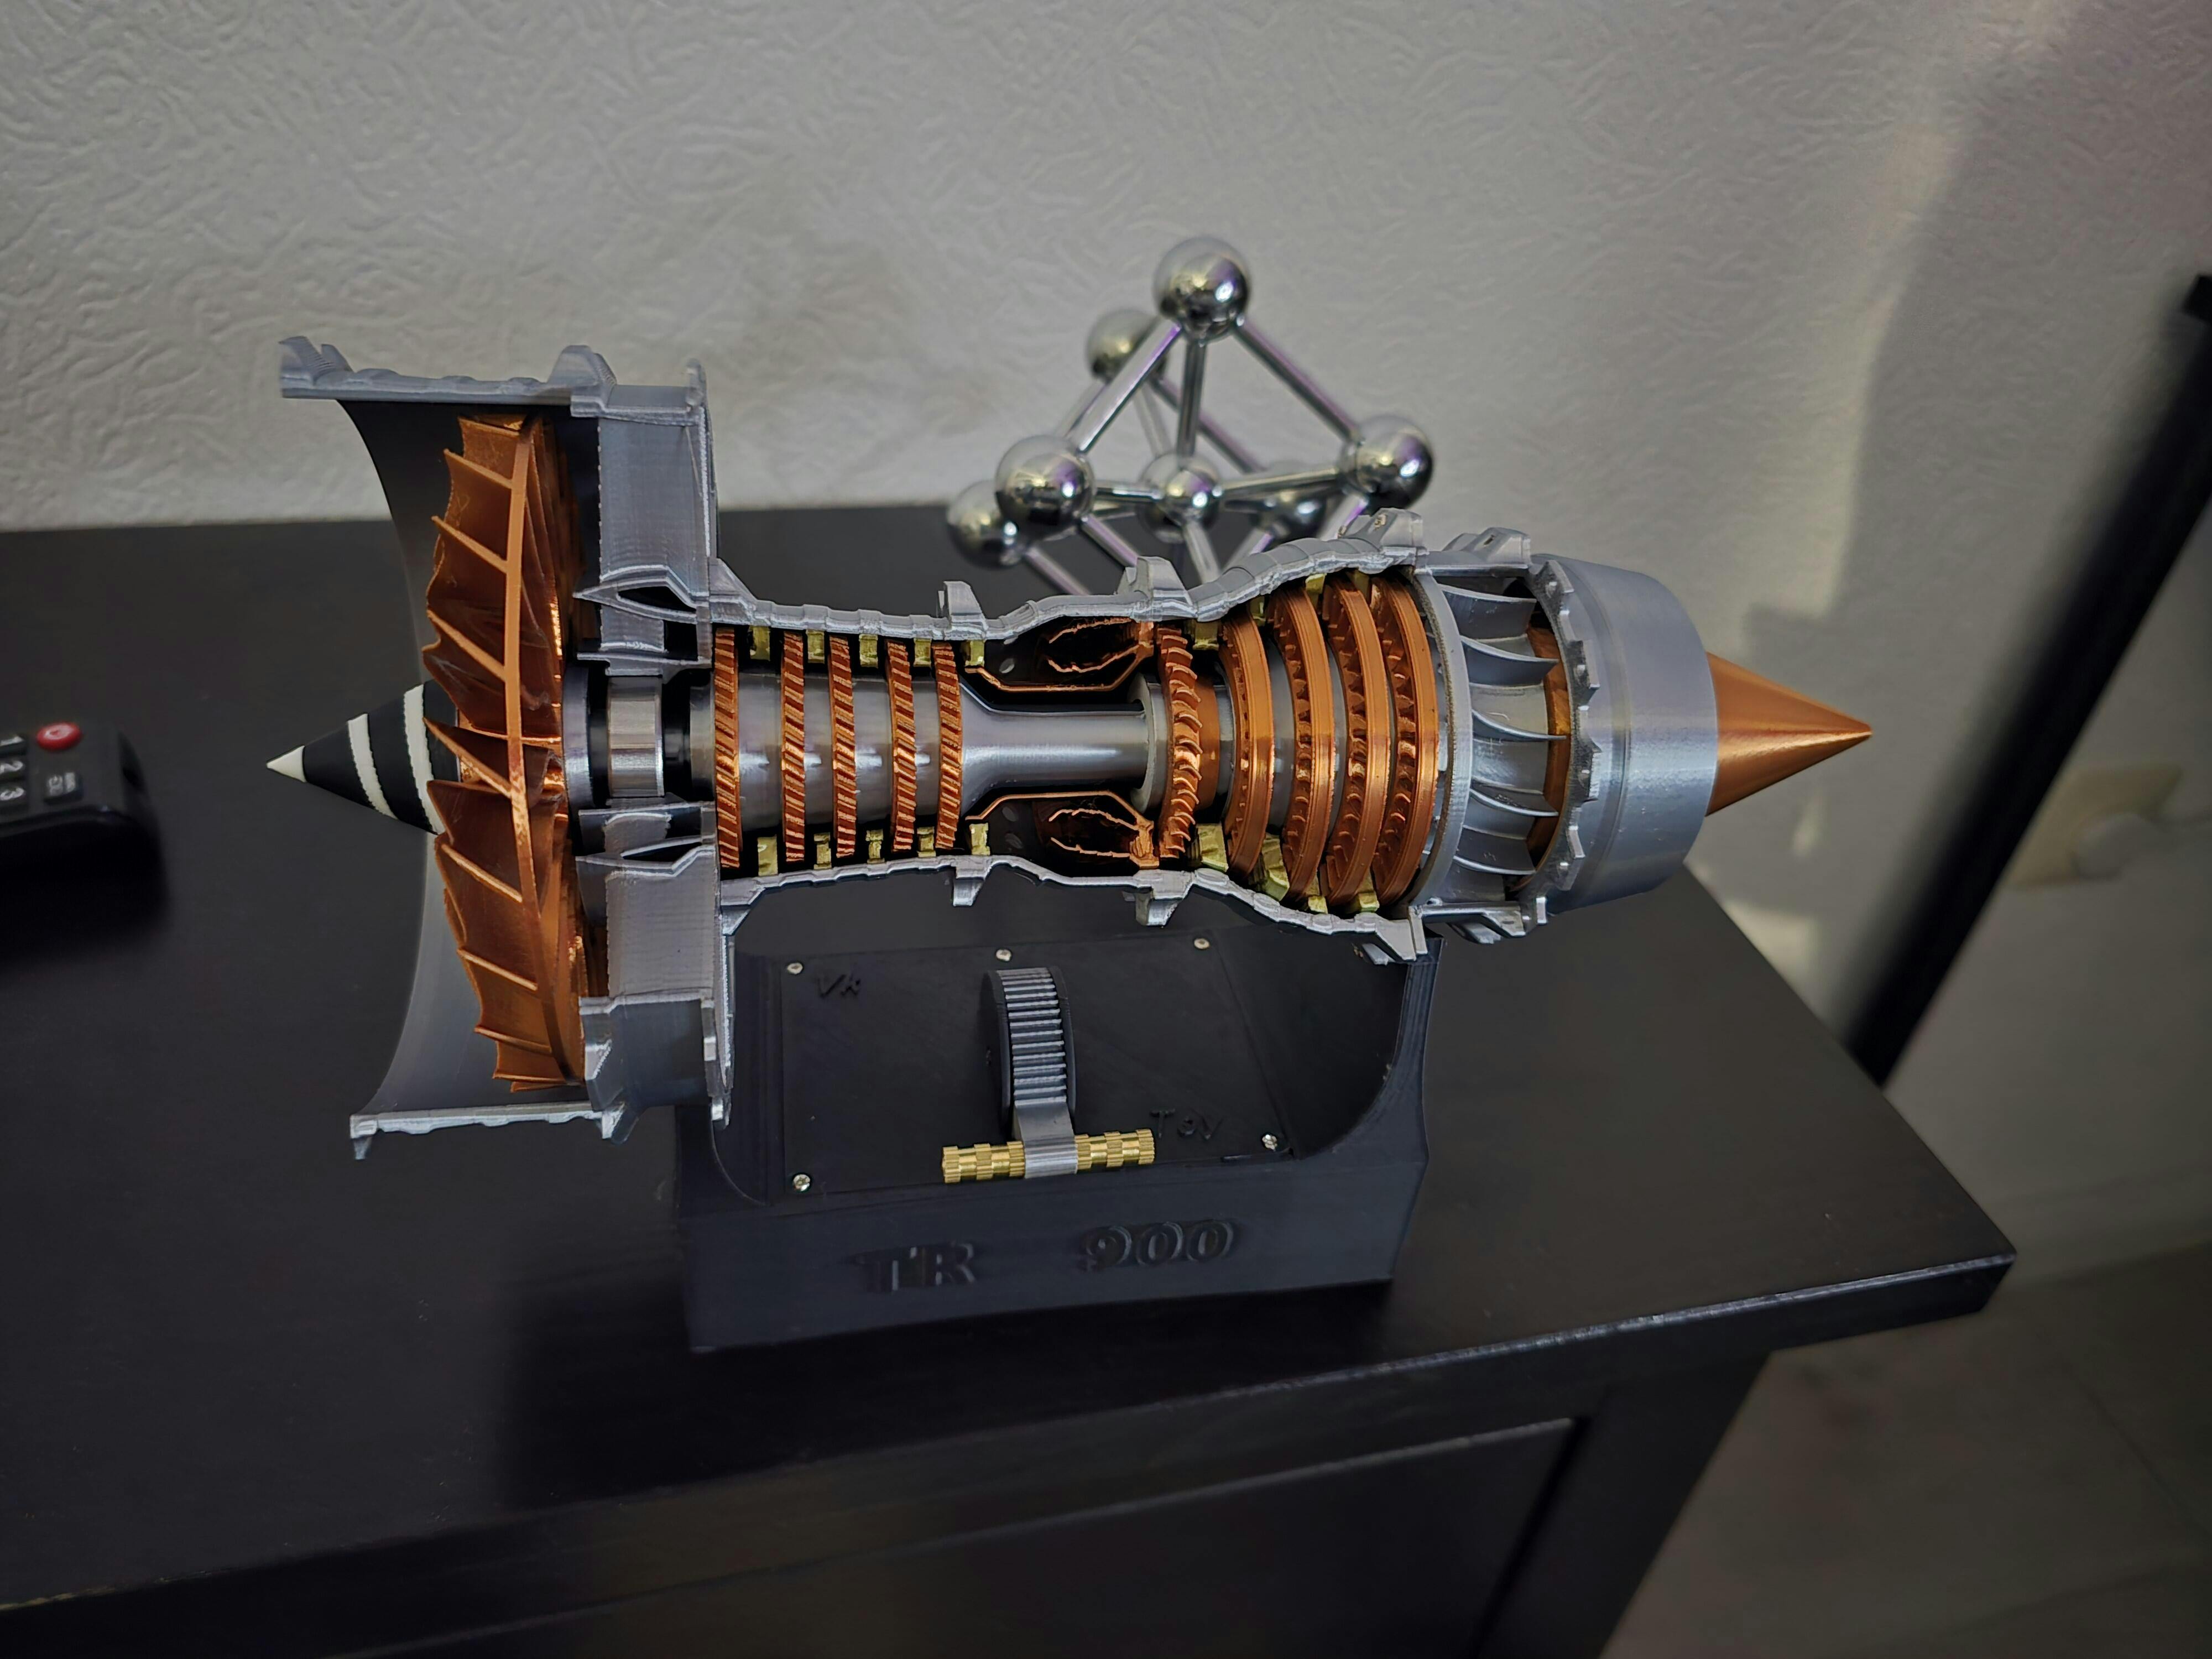
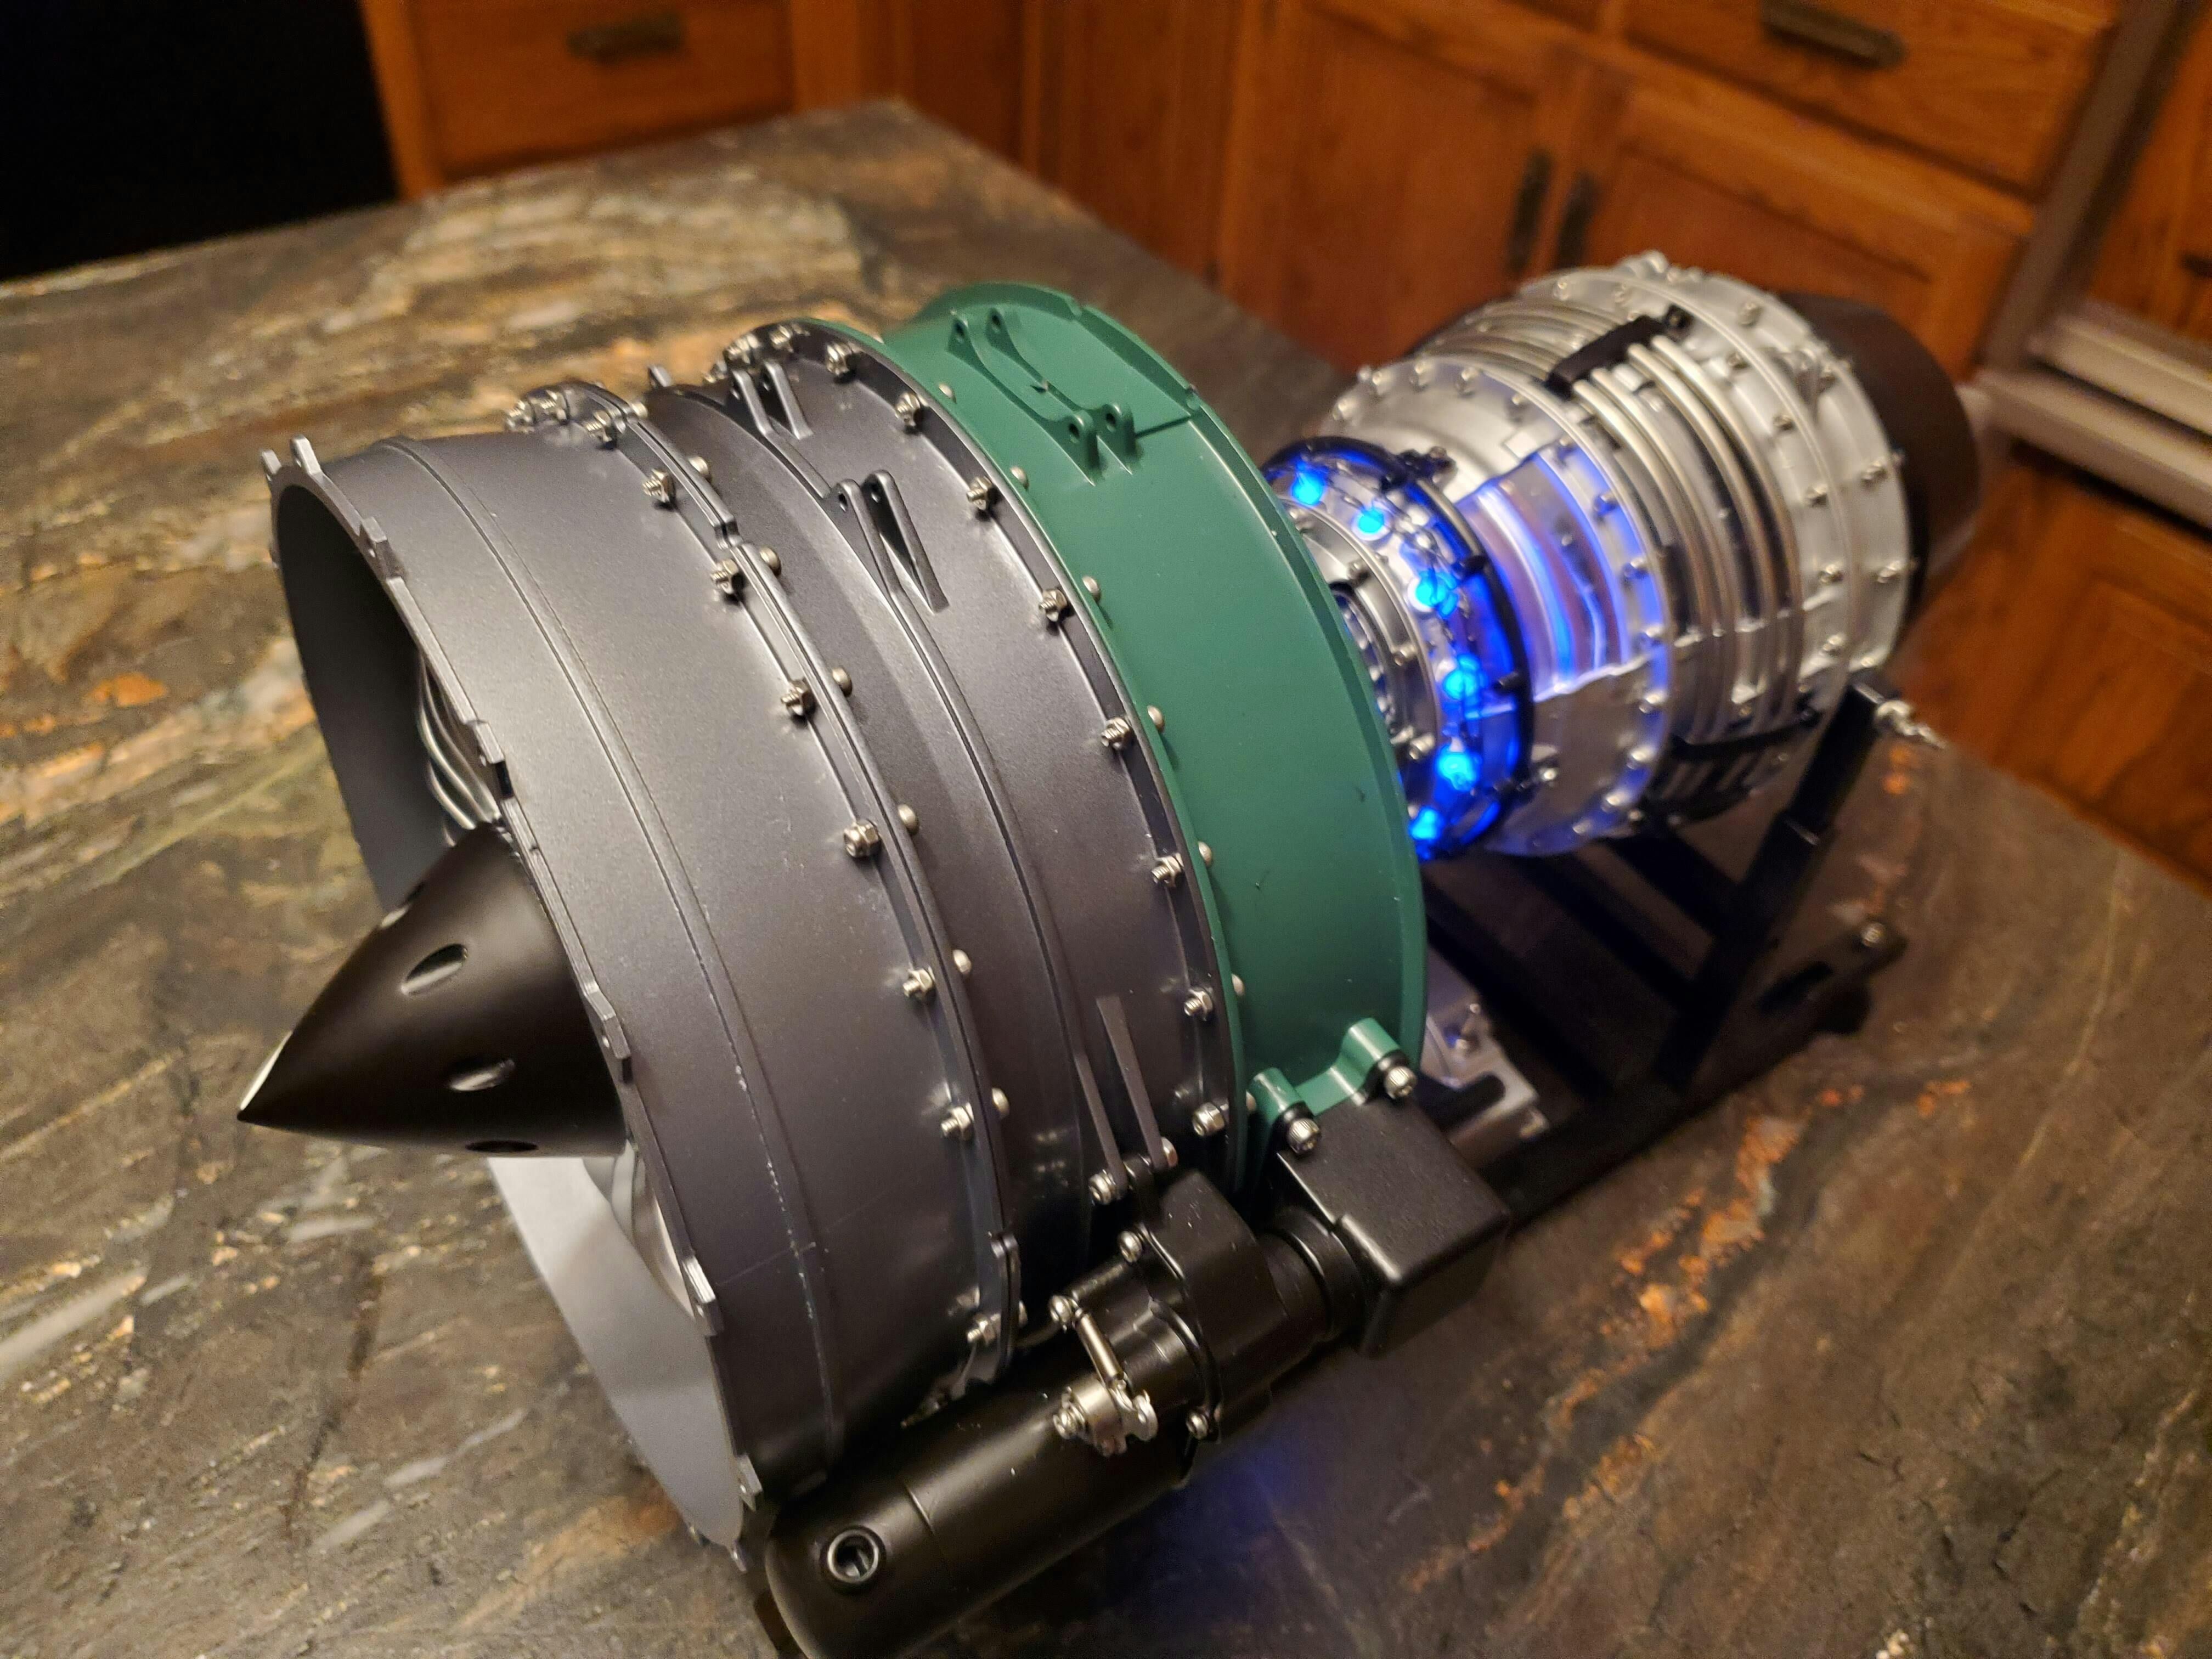
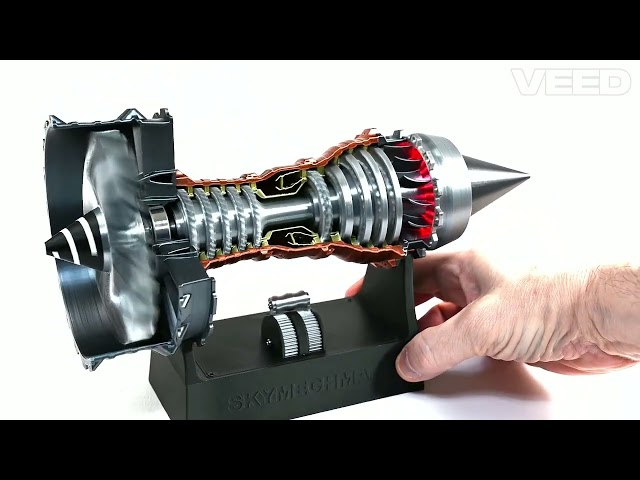
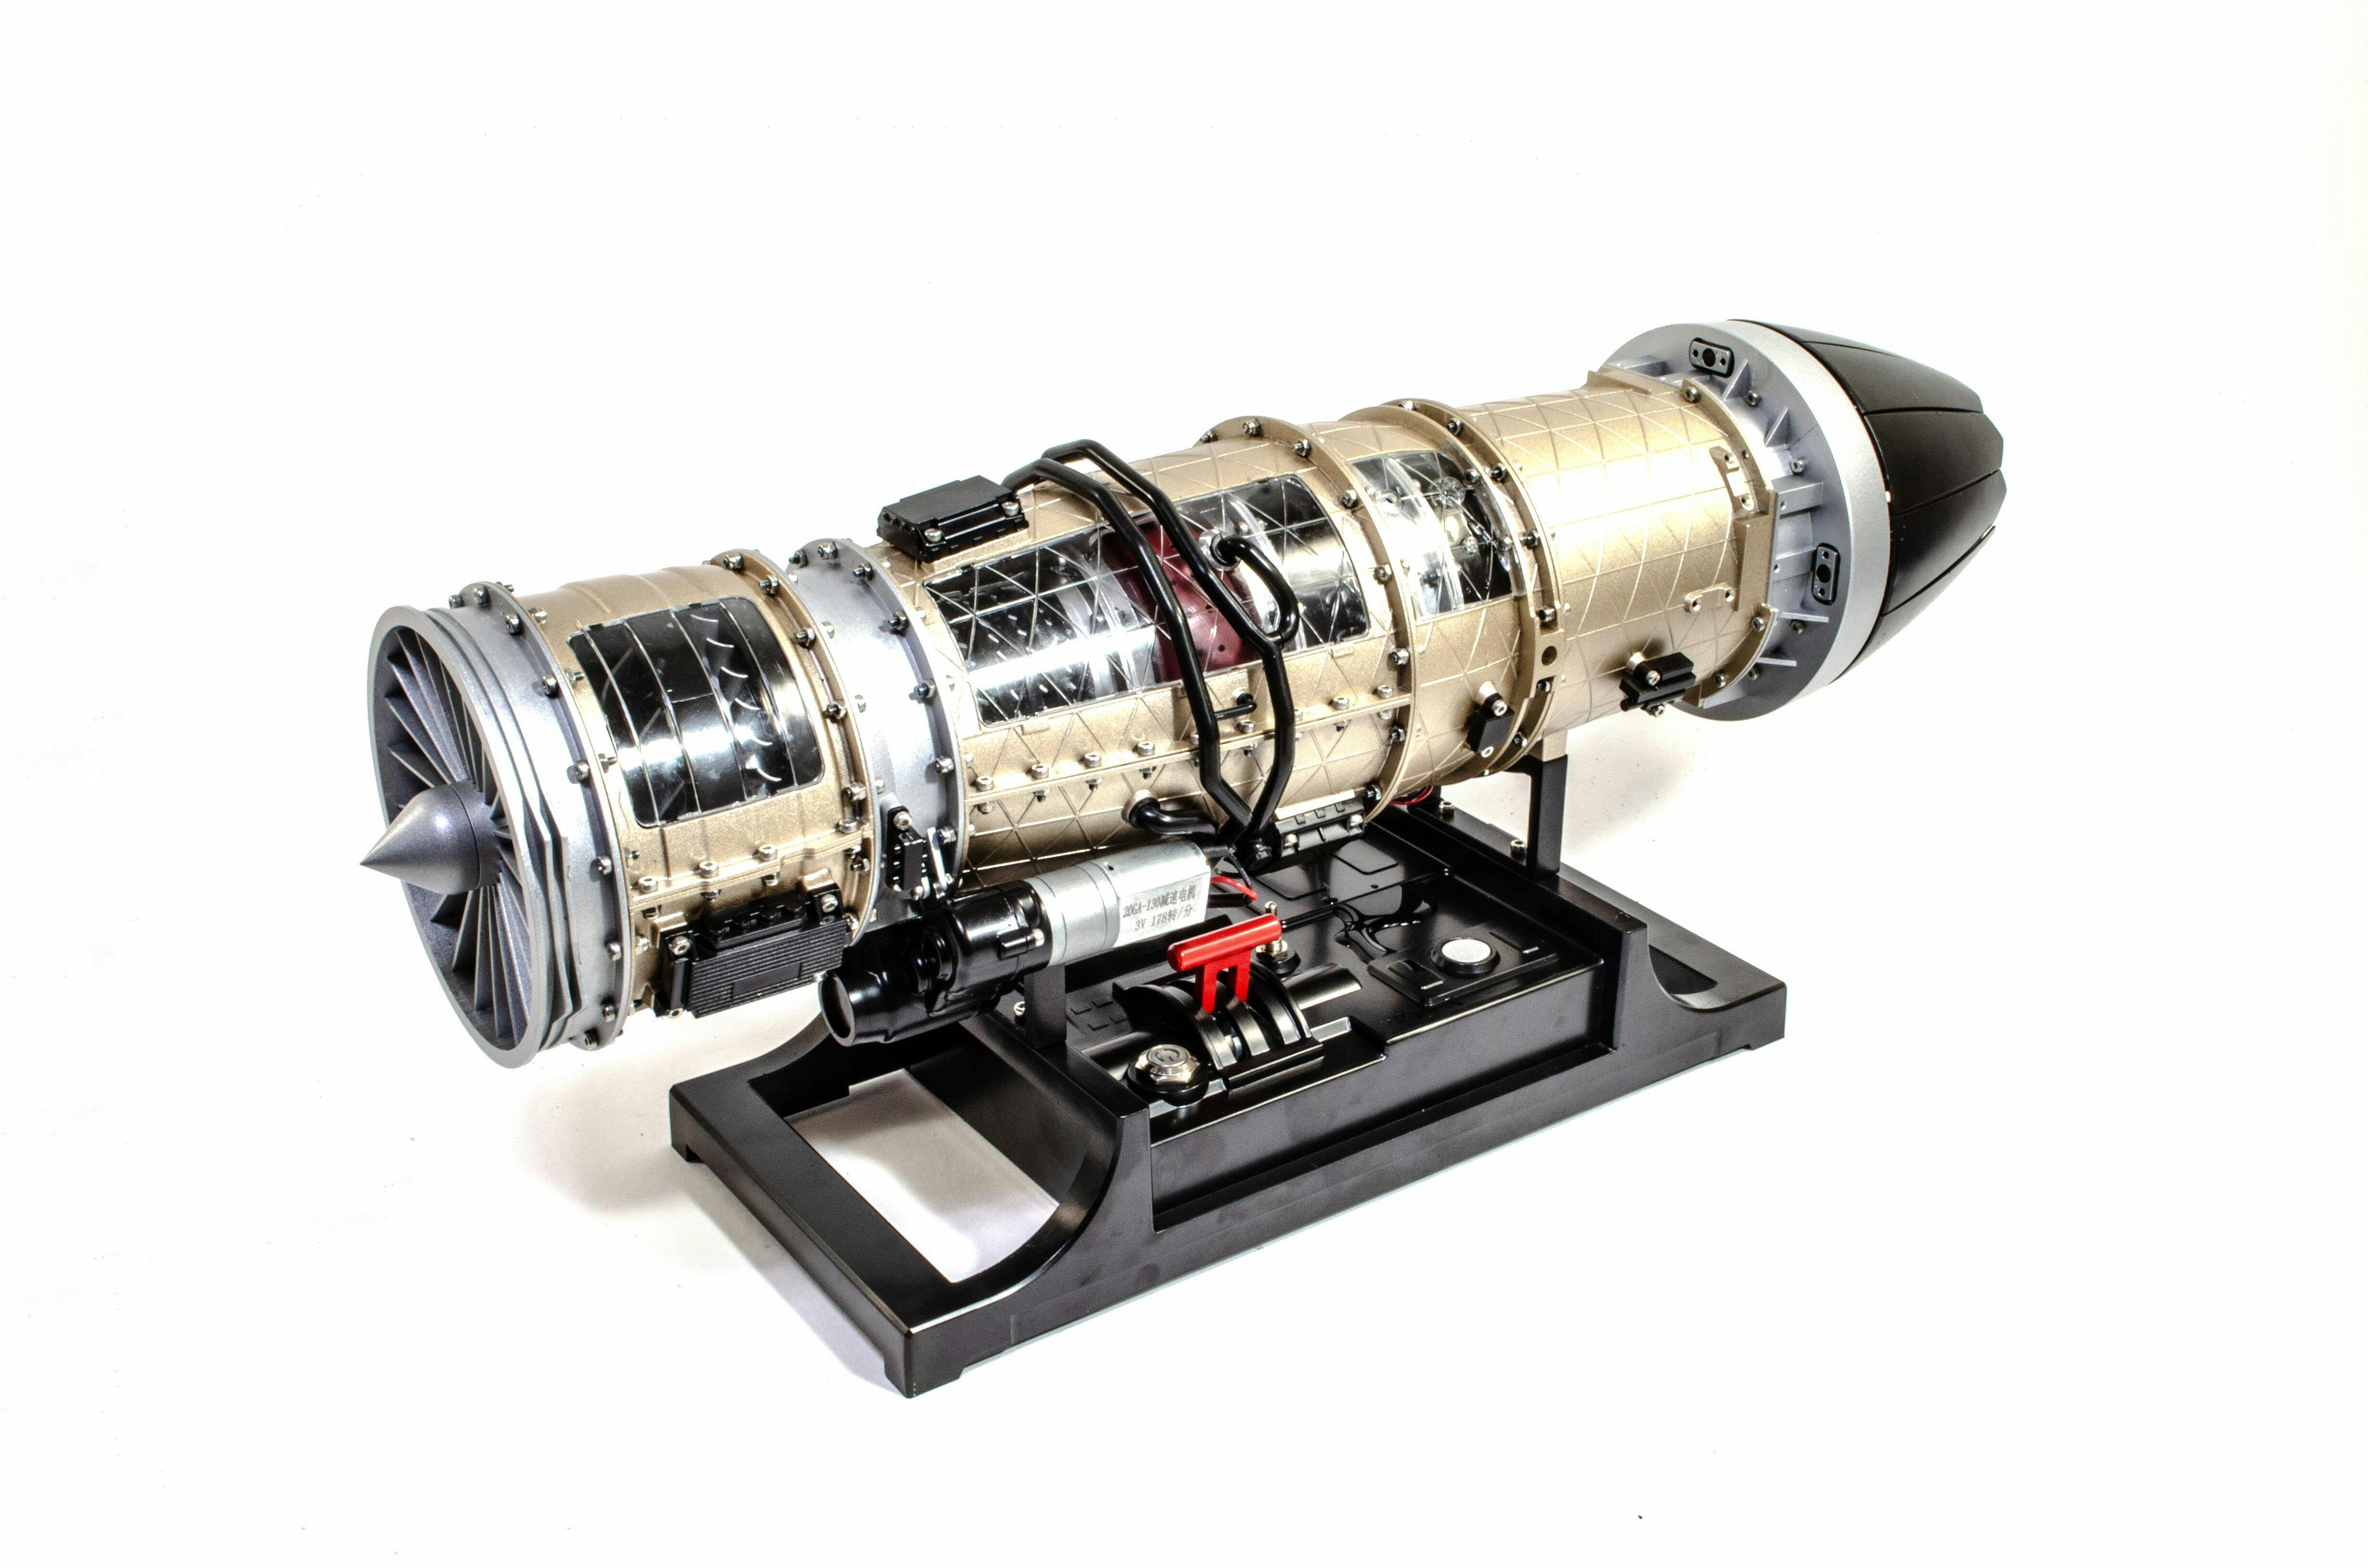
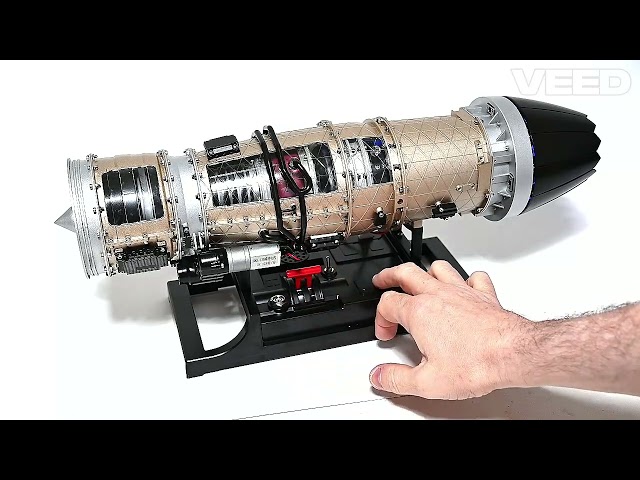
This is a very realistic working turbine model. It can very easily be modified to insert a strip of blue LED "burners," and if you are daring enough to bolt the model down, it will run on butane fuel.


The turbine is very detailed and looks perfect, great price/performance
The compressor shaft and the fan blades don't seem to have any slots so that they can be connected together as seen in the assembly instructions. Please look at the attached pictures. Looking forward to your reply.


Very well manufactured kit. The plastic windows are tricky. My daughter built in LED burners, she made up the wire leads to look like pilot gas and a fuel gas lines.

This engine is absolutely beautiful and fantastic.
The machning is really good.
Some details could be improved :
Mounting instruction.
The section about the oil and water line is really poor.
The piston rings orientation could be also more clearer and also on the rods you have a small lubrification hole.
Take care to put in in the center of the engine (to get oil from camshaft)
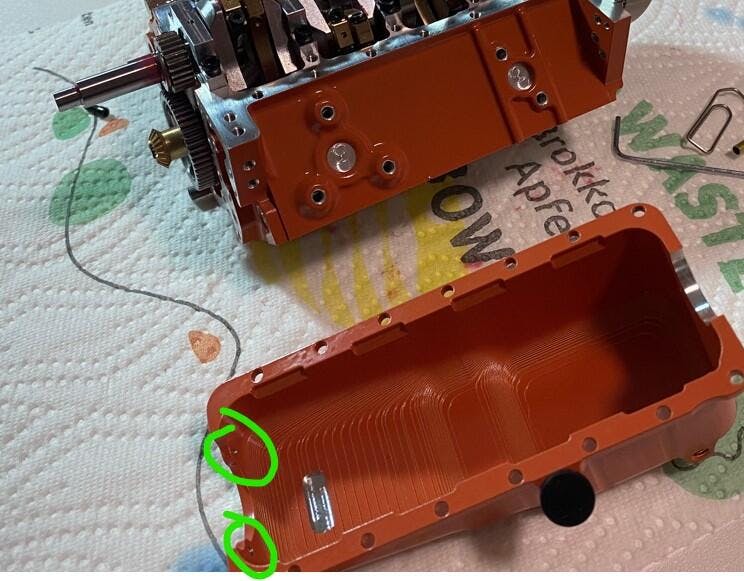
2 threads in the oil pan is not in the good size (M2 instead of 2.5)
The head gasket is also not perfect. Had to cut a little bit the hole where pushrods get through (most of them are touching the gasket and the valves doesn't close easily)
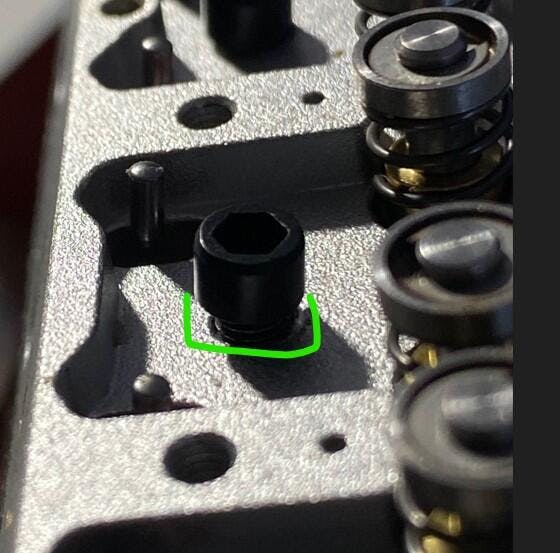
In the cylinder heads, they should add a lillte machining under the 4 long screws because the surface is not parallel of the bottom of the screw and they are note sitting properrly
And for the complete set with water cooling, you have no instruction how to connect the second extra tank ( for fuel but no tube in or for coolant)

When I revived the box it came well packaged with a protective layer of bubble wrap. The introduction manual is very clear and well put together. I do have two issues to be addressed though when building the the engine I ran in to two issues when assembling the outer casing for the engine part number 81 and 80 seemed to have two sets of holes drilled very close to one another and caused the rest of the build to not line up afterward my second issues was the main shaft was some what unclear as to how far it would be going down in the build. But other than those two issues I had the rest of the build was super fun to assemble and test


A fair few parts of this kit are already pre-assembled, leaving the builder to complete the rest. This is such a relaxing build and I built mine in around an hour max. It also looks great when built and is perfect for a shelf or desk. Absolutely love this one. No problems in build and no hassles in running. Amazing to think it's 3D printed too.
Here's my site review:
https://modelshipworld.com/topic/37746-125-rolls-royce-trent-900-turbofan-skymech-via-enginediy-build-review/

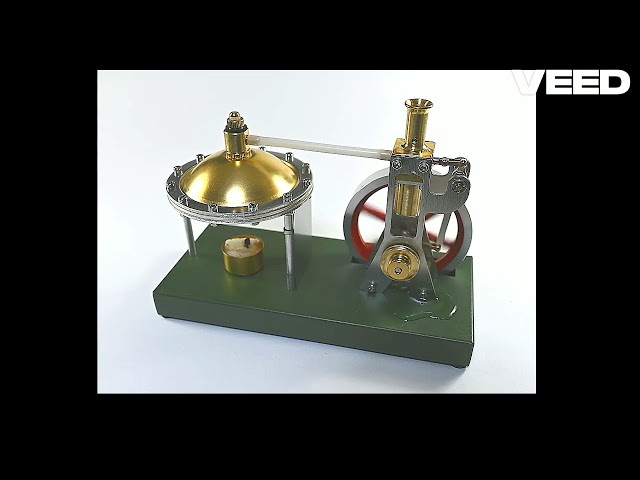
This really is a nice project, taking under 2hrs to build. Operation is also very simple, making this a perfect project for the beginner.
Read my review here: https://modelshipworld.com/topic/37675-vertical-steam-engine-kit-enjomor-from-enginediy/
Gonna do a complete writeup and review with pictures really soon. Just now working out the bugs and finally getting it to run now but only on the glow plugs and homemade fuel so far. Could not get CDI and gas to work properly yet, but carb wasn't set correctly. Had no idea where to even start with the carb, not that I don't know how to tune a carb (first time tuning this size and kind of engine though), not even that I didn't eventually find some help online (from Stirlingkit more though), or even after all that I could even understand the very very very hard to understand directly translated instructions in fact it would have all been easy except one main thing:
The damn instructions assume you have experience with this style of carb and know which needle is which, and it does not label what is the "main oil needle" or whatever anywhere and if you don't know then your lost. It took taking it apart for me to even realize oh duh it's just a slide carb, with diaphragm pump.
If the instructions labeled the needles on the carb and maybe even have the user themselves assemble it, not have it preassembled so they have a better understanding of how it works, it may make it easier for beginners to get it running.
Cause I'm sorry folks, unless you have worked with RC or model engines before, no these engines are not easy to get running like advertised. They do not just start right up like on YouTube.
But don't get me wrong it's been fun! I'm just the DIY/tinkering/tweaking/inventor/pioneer/too smart for own good/just plain bored type. Peace
My advice so far is start with what the book says and use nitro fuel and glow plugs and run it as a compression type engine first until you verify it's good, and get the carb tuned for that first. It will make it easier to tune it to gas, and make sure you use either your own or a good (old version) CDI. Personally I plan on scraping the hall sensor and using something like a photoeye maybe.
But hey what do I know about engines my degree is electronics engineering. But I'm trying. Also in the future will be doing all kinds of would like to do all kinds of reviews on different mods, as well as using different DIY or commercial fuels. Hydrogen would be cool. I can see hooking on up to my HHO torch machine and running it off of that using water as the fuel. But also maybe something homemade and free like woodgas would be awesome also. Look forward to my reviews on the future but be patient. Also will be doing an enjomor L4 with turbos and Toyan V8 new version, flat 4, etc.
**Btw the picture isn't it's current state, that was when I first built it straight out of the box. I had several problems some of which or most/all of which seem to be common with a lot of people and it takes so long for EngineDIY or Stirlingkit to process and ship stuff, so I had to kinda build my own quick makeshift electrically insulated base to mount engine upon, which mounts to semto base, as people know the screws don't line up on the semto base properly!!!!! However, gonna do the detailed review on the Toyan X-Power-A water cooled version I bought from Mechartisans off of SHOP app. It came like ten times faster than EngineDIY or Stirlingkit, and was cheaper, came with starter/water kit etc. more on this later**


Building the motor is no problem however the Ignition module can only handle max 5 volts no where in the instructions say that I made the assumption that since the starting motor is 7.4 volts that the ignition modules are the same well there not the second I flipped the switch they went pop so now I can’t even start the motor how fun

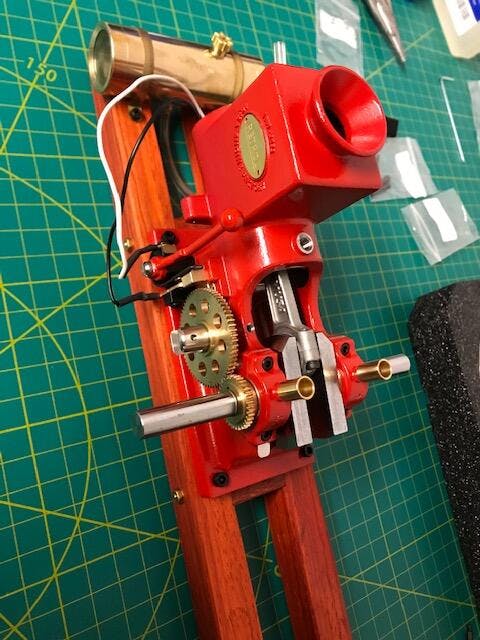
This was my first kit from engineDIY, I have purchased this one because I wanted a Hit & Miss engine model that function like the real thing, and also have scale looks to it and not the same square form that other engine models have.
I decided on the KIT, so that I can enjoy the building experience, and also learn how everything is put together and how it works, as an introduction into the hobby.
The kit was shipped quickly, and very well packed, everything arrived in one piece.
As for the kit it self and the parts, the machined parts are impeccable (only paint issues, but not many), all parts fit together very good, including the fine parts which need very low tolerances fit nicely and my fears of having a delicate part not fit went away quickly. most painted parts were very nicely painted with a few very small occational scuffs
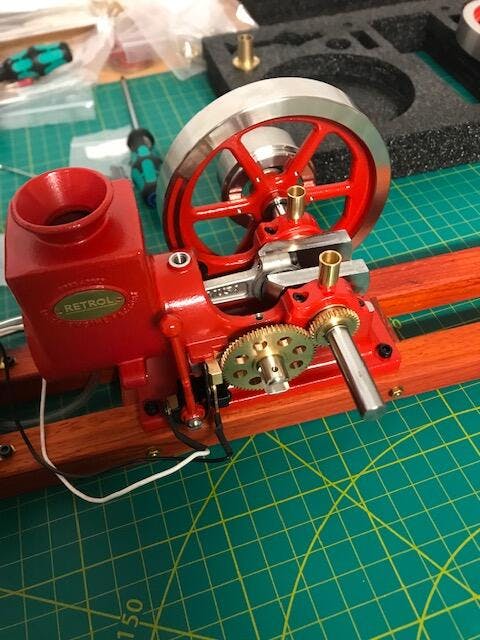
What I would suggest - build the kit when you have time and are stress-free, take your time, don't rush (especially with fine threads), and pay attention to the conical brass sleeves of the fly wheels - do not tighten them until the fly wheels are set in their final position as once those are tighten you can not remove those without damage to the parts. also follow the instruction booklet don't skip steps or mix them up, I took the exact steps from the manual (what some you YT do not do) and found it was a smooth ride, as almost everything is very thought out.
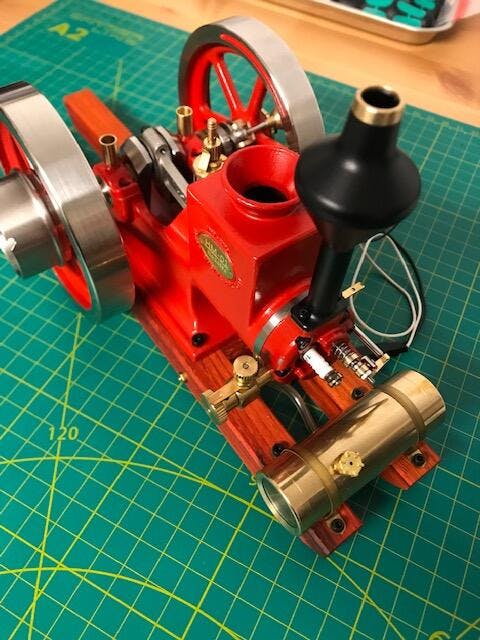
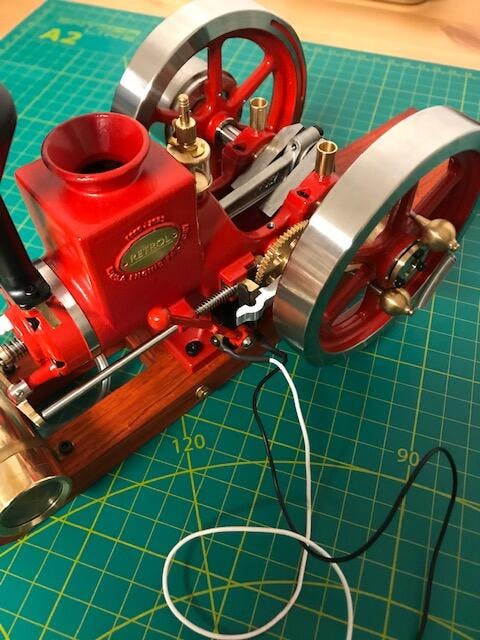
I have finished the engine it self, I still have the ignition kit to assemble, but that will be no problem.
My overall experience is pure joy.
My only critic, is that the instructions do not contain the warning in regarding to the fly wheel conical brass inserts, to make sure people avoid tightening them immaturely and having massive issues (thankfully I have seen the warning in a YT video) also could be nice if the first page in the instruction would clearly list the tools and oils required for the assembly, another small critic is on the "old version" crankshaft there are four edges that are sharp and should have been beveled out to avoid people cutting them self while assembling it.
Overall impressed, great value, I am a pretty critical person and I am telling you, this kit is worth it.


I very recently built this turbofan engine and have done a complete build review and video. Check out my link:
https://modelshipworld.com/topic/37583-110-military-turbofan-engine-teching-build-review/#comment-1075657
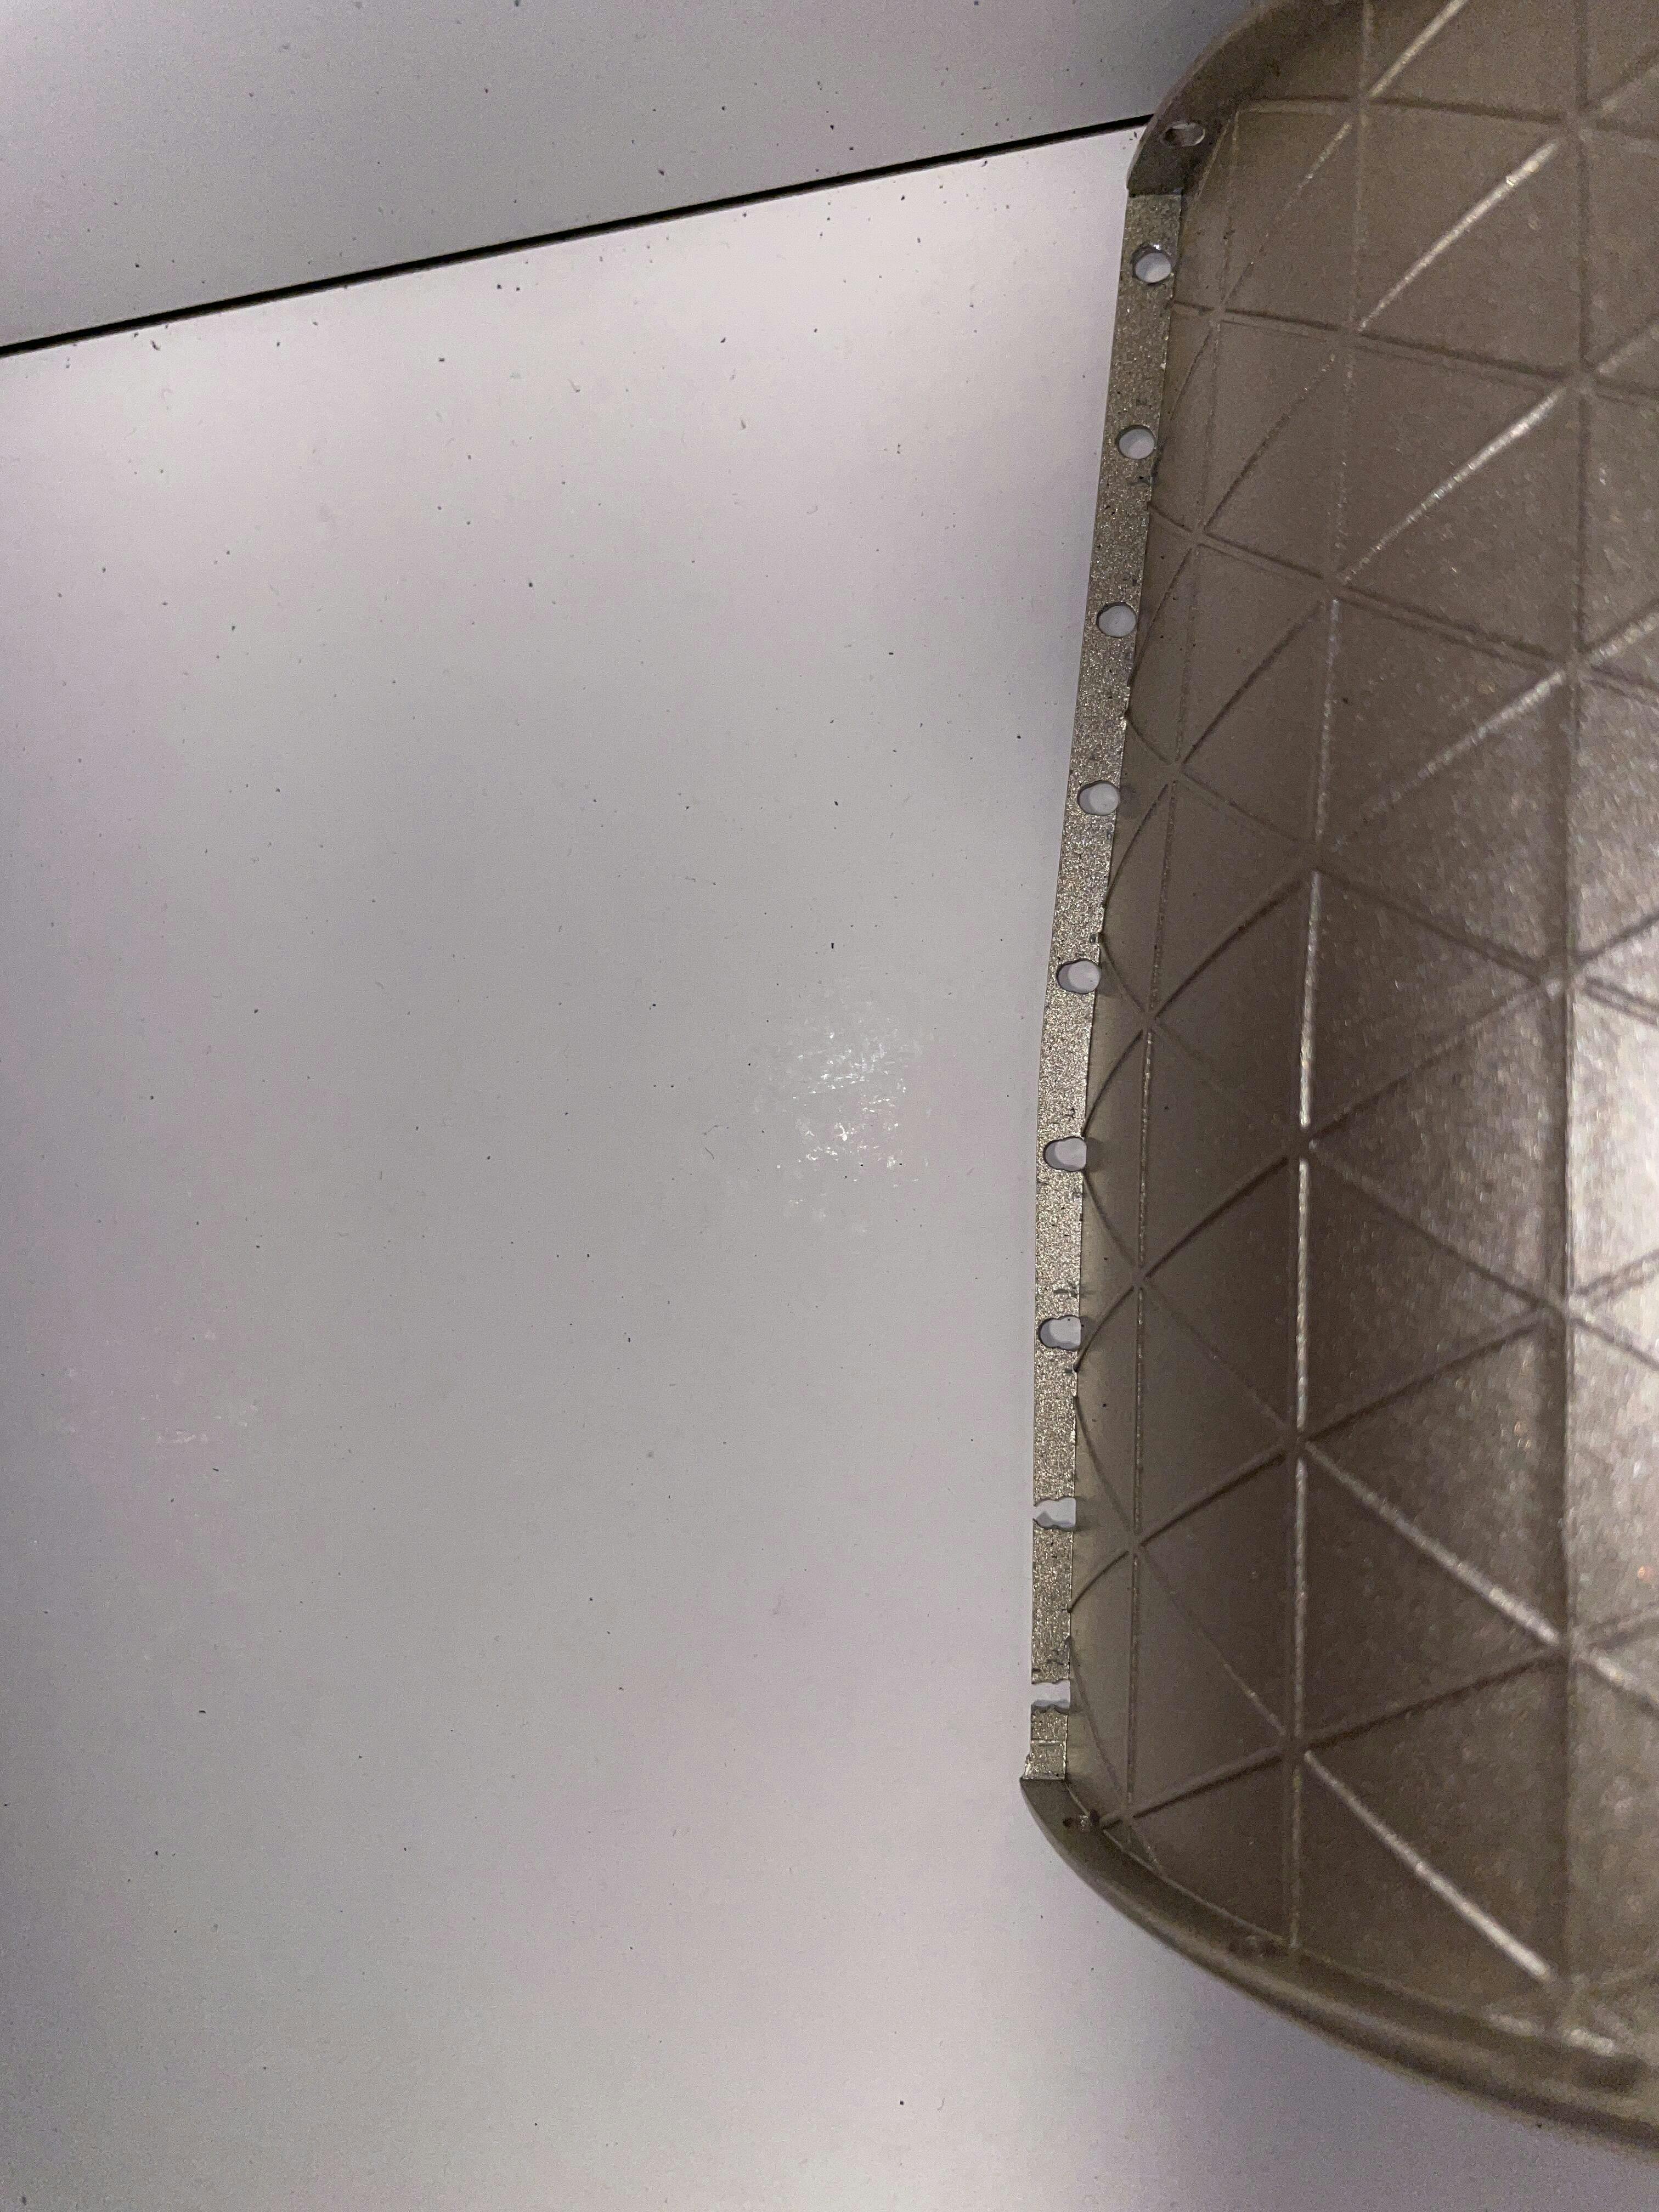
This larger radiator combined with a fan shroud should help keep the Toyan L400g from overheating. This radiator is of excellent quality and size, and has a divider in the top tank to ensure the water flows through the core of the radiator. The shroud will ensure the fan sucks air through the radiator core. I’m hoping for good results with this setup.


